
Warm and gooey cinnamon rolls with fresh apples added into the mix! These rolls start with a pillowy soft homemade dough (that's so so easy to make and only requires ONE rise). They're filled with gooey cinnamon sugar and chunks of fresh apples before being rolled, cut, and baked. They're smothered with a maple cream cheese icing for a warm, gooey, and decadent sweet treat.

apple cinnamon rolls
These rolls are like a cross between apple pie and cinnamon rolls. The recipe starts off with my favorite cinnamon roll recipe as the base with a few tweaks to transform them into this apple version! They're soft and pillowy with gooey centers and an even gooier cream cheese icing. They only need one rise so you can have these ready within less than 2 hours but they're also great for make ahead cinnamon rolls!
best apples for baking
When baking, the apples you choose can impact the final texture and flavor of the filling. You want to look for apples that hold their shape well when cooked and also have the ideal balance of a slightly tart yet sweet flavor.
My favorite apples are Granny Smith or Honeycrisp, but some other amazing options include Braeburn, Fuji, or Jazz apples. These varieties are the right balance of crisp, firm, sweet, and tart but still soften to perfection when cooked / baked. You can also mix & match and use a combination of apples if you prefer.
Whatever you do, avoid apples that have a softer flesh (like Red Delicious or gala). Soft flesh apples are great for making something like apple sauce because they break down very well, but in a recipe like this, they just turn to mush.

how to make apple cinnamon rolls
These apple cinnamon rolls start by making a simple homemade dough that bakes up incredibly light and fluffy! You can break the process up into 4 simple steps:
- Whisk together dry ingredients.
- Whisk together wet ingredients. This starts by warming water, milk, and butter. You're looking to get the mixture warm but NOT hot. The butter should also mostly be melted, but it's fine if you have a few tiny chunks of undissolved butter. The egg is then whisked into this mixture.
- Combine wet and dry ingredients. The mixture will start off very sticky. Slowly mix in more flour until it starts to ball up into more of a doughy mixture.
- Knead dough. Finally, the dough is kneaded to incorporate air and build structure. You can do this by hand directly in your bowl or with a stand mixer fitted with the dough hook attachment.


After the dough is made, it needs to rest for about 20 minutes. This isn't exactly a "rise" - so the dough will puff slightly but it won't double in size. If you try to roll the dough out right away, it will pull back in on itself. This rest allows the gluten to relax so the dough is easy to roll and shape.
After it's had its rest, the dough is then rolled out into a rough rectangle shape and topped with the filling ingredients. First, the butter is spread onto the surface of the dough before the sugar, spices, and apples are each sprinkled on top.
It's all rolled up into a tight log and cut into rolls. After arranging the rolls in your baking pan, they then need to rest and proof for 45 minutes or until they double in size.
The risen rolls are then baked until golden brown and topped with a maple icing. To make the icing, you simply cream together all the ingredients until smooth then frost the warm rolls. The icing will melt slightly and sink into the nooks - making the rolls EXTRA gooey.


how to tell when dough is perfectly kneaded
Kneading is an important step in most bread recipes and is one of the factors that determines the baked roll's final texture. Properly kneading the dough will incorporate air and build structure, creating a roll that doesn't easily fall apart while still maintaining a soft, airy, and tender texture.
To tell when your dough is perfectly kneaded, the dough should be:
- smooth: Kind of self explanatory - the surface should no longer appear lumpy and bumpy.
- springy / elastic: If you poke the dough, the center should spring back slowly. If it remains indented, it needs more kneading. The dough shouldn't feel overly firm though and the indent shouldn't spring back too quickly (that's a sign that it's been over kneaded).
- slightly tacky but NOT sticky: Again poking the ball of dough, you shouldn't have any dough sticking to your fingers. It's important to do this with a clean finger because any dough stuck on your hands from the kneading process will cause the ball of dough to stick regardless.


tips for making the BEST apple cinnamon rolls
To make sure your cinnamon rolls come out perfect, bakery level gooood, here are a few tips to keep in mind:
- before you start: Check to make sure your yeast isn't expired, otherwise it won't activate. If you buy yeast in the bigger jars, it's also best not to use one that's been opened for more than about 6 months - as it sits, it loses its functionality. If in doubt, you can test if your yeast is active by dissolving it in some warm water with about 1 teaspoon of sugar. After sitting for about 5 to 10 minutes, the surface of the water should be foamy and bubbly - if it's not, odds are your yeast is no good. But it could also be due to the temperature...
- temperature: For yeast to properly work, it needs ingredients that are neither too cold (which will cause the yeast to work VERY slowly) nor too hot (which can kill the yeast and render it unusable!) The best temperature for an ingredient like eggs is room temperature. When it comes to the water, milk, butter mixture, they need to be around 110F. An easy way to test for the temperature without a thermometer is to dip your finger into it! You shouldn't feel a significant shift in temperature (neither too hot nor too cold) - the water should just feel slightly warm.
- flour: This part used to mess up EVERY cinnamon roll recipe I had ever tried when I first started baking!! Flour is very easy to accidentally mismeasure and it can lead to dense and dry cinnamon rolls. It's best to measure flour using a scale, but if you prefer to use cups, make sure you use the spoon and level method: lightly spoon the flour into your measuring cup and use a butter knife or flat utensil to level off the excess. Never scoop your measuring cup directly into the bag of flour otherwise this can pack in more weight worth of flour!
- kneading: Like I mentioned above, kneading is a very important step to ensuring you have perfect cinnamon rolls! So keep an eye out for perfectly kneaded bread.
- very soft butter: For the filling, it's best to use butter that's a little more softened than usual because it helps prevent tearing on the dough when you spread it on top. If it's not soft enough, you can give it a little mash with your fork to get it to a more spreadable consistency.

how to cut apple cinnamon rolls
When I make plain cinnamon rolls, I like to use dental floss to cut them just because I find it's easier. You could technically use the floss trick for these rolls, but the floss can get caught on the apples and drag through the dough. That's why I find that a knife works better here.
Start by grabbing a large sharp knife. A serrated bread knife works best for the least amount of squishing but a regular sharp knife will also work in a pinch.
If you'd like, you can cut about ½ inch off the ends of the roll - because they can bake up a little funny looking and they'd be a little skimpy on the filling. But it's not totally necessary.
Before I start cutting the rolls, I like to use the back of the knife to make little marks in the dough so I know where to cut. There's NO way I'd get even sized rolls by just eyeballing it. I mark the center first, then mark the center of each center (so the dough is in ¼ sections). And finally, I'll mark each section into thirds for a total of 12.
When cutting, don't press straight down or you'll squish the roll. Instead, saw back and forth while slowly moving down to get a nice, clean cut!

when to frost cinnamon rolls
If you like an ooey gooey cinnamon roll, frosting the rolls while they're still hot will help make them EXTRA gooey! The icing will melt slightly and get into all the crevices. If you prefer a more distinct layer of icing, you can wait for the rolls to cool a bit longer before spreading the icing on top. The longer you wait, the less melty it'll be.
I wouldn't recommend topping the rolls with icing right when they come out of the oven because they may get too melty. Letting them cool for about 5 to 10 minutes is best - which is the perfect amount of time needed to make the icing anyways.
can you make these apple cinnamon rolls the night before?
Whether you're prepping cinnamon rolls for Christmas morning, Thanksgiving brunch, or just a regular old day of the week, these make an incredible make ahead dessert! You can prep these rolls and pop them into the fridge the night before then bake fresh rolls the next morning.
To make overnight cinnamon rolls, follow all of the steps up to and including cutting the rolls and arranging them in your baking pan (step 13). BEFORE allowing the rolls to rise for 45 minutes, cover them with plastic wrap and transfer to the fridge. The cold fridge will significantly slow down the rise, allowing the rolls to sit for longer before baking.
When it's time to bake overnight cinnamon rolls, take them out of the fridge and set them out at room temperature (still covered) for about 1 hour or until the rolls are no longer cold to the touch. The rolls may not puff up quite as much as they would if they were fresh but that's OK. Continue on with the rest of the recipe as normal.
check out these other cozy recipes!
• Brown Butter Maple Crumb Cake
• Apple Coffee Cake
• Apple Pie Cookies
• Cinnamon Roll Cheesecake
• Moist Spice Cake
• Cinnamon Monkey Bread
Lastly, if you made this or any of my recipes, be sure to leave a comment and review below! I love hearing your thoughts! Also tag me on Instagram @eatsdelightfulblog so I can see what you're making.
Print
Apple Cinnamon Rolls
- Total Time: 1 hour 55 minutes
- Yield: 12 rolls
Description
Soft and fluffy cinnamon rolls swirled with sweet spiced sugar and apple chunks and slathered in a gooey maple cream cheese icing!
Ingredients
For the dough:
- 4-5 cups (520-650g) all-purpose flour + more for kneading
- 2 ¼ teaspoons (1 package) instant yeast
- 1 teaspoon salt
- ¼ cup (50g) granulated sugar
- ½ cup (120mL) milk
- ¾ cup (180mL) water
- ¼ cup (60g) unsalted butter, cut into 4 slices
- 1 large egg, room temperature
For the apple filling:
- 6 tablespoons (85g) unsalted butter, VERY soft
- 1 cup (200g) light or dark brown sugar, packed
- 2 tablespoons ground cinnamon
- ¼ teaspoon ground nutmeg
- 2 cups (220g) peeled & diced Granny Smith apples (about 2 apples)
For the maple cream cheese icing:
- 4 oz (115g) full fat block cream cheese, room temperature
- ¼ cup (60g) unsalted butter, room temperature
- 1 ½ cups (180g) powdered sugar
- 1-2 tablespoons pure maple syrup
- 1 teaspoon pure vanilla extract
Instructions
- In a large bowl, whisk together 3 cups / 390g of flour (to start), yeast, salt, and sugar. Set aside.
- In a medium microwave safe bowl or cup, combine milk, water, and sliced butter. Microwave in 10 second bursts until the butter just melts and the mixture feels warm but not hot. You can also do this with a pot placed on a stove burner set to low heat.
- Whisk the egg into the water mixture to combine.
- Pour the wet ingredients over the flour mixture. Using a wooden spoon, mix together until you have a very thick and sticky dough.
- Add another 1 cup / 130g of flour to the dough and mix until it starts coming together into ball.
- Knead the dough, adding flour as needed to keep it from sticking to your hands / the sides of the bowl, until it's smooth, elastic, and slightly tacky. If you poke the top of the dough, it should spring back - if the indent remains, the dough needs more kneading.
- Cover the dough and set aside to rest for about 20 minutes. This is just to relax the gluten and make the dough easier to roll without it pulling in on itself - so it won't quite double in size but it should puff up slightly.
- Turn the rested dough onto a lightly floured work surface and roll it out into a rectangle that's about 10x14 inches. Use your hands to press and pull the edges to get as nice of a rectangular shape as you can - it doesn't have to be perfect though!
- Spread the softened butter over the dough, leaving a roughly ½ inch boarder around the edges. Sprinkle the brown sugar on top and use your hands to spread it out into an even layer over the butter. Then evenly sprinkle the cinnamon and nutmeg on top followed by the chopped apples.
- Working along the 14 inch side of the dough, roll it up into a tight log.
- Use a sharp serrated knife to cut about ½ an inch off of each end of the log (this just makes for nicer and more uniform rolls - you can bake them off separately or just skip this step entirely if you don't mind the appearance).
- Use a sharp serrated knife to cut the log into 12 even rolls. When cutting, don't press straight down or you may squish the rolls. Instead use a sawing, back and forth motion so they keep their shape. A serrated bread knife is best, but a sharp chef's knife will also work - you just need to be a bit more careful not to squish the rolls.
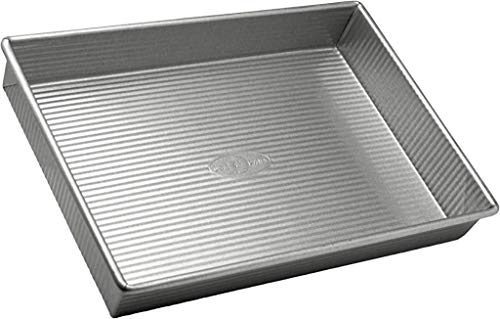
- Arrange the rolls cut side up in a 9x13 inch baking dish. It's OK if the rolls are touching. * SEE NOTES for overnight instructions
- Cover the rolls and set aside in a warm place for about 45 minutes or until doubled in size. They should fill the pan and be pressed against each other after they've risen. My favorite place to keep cinnamon rolls during this time is in the oven (it shouldn't be on or hot). Keeping them in the oven keeps the rolls safe from any cold drafts.
- Take the rolls out of the oven (if that's where you kept them) and preheat the oven to 350F.
- Uncover the rolls and place into the center of your preheated oven. Bake for 25 to 30 minutes or until lightly browned on top and the center springs back if you gently poke it. Set aside to cool slightly while you make the icing.
- In a medium sized bowl, combine all the icing ingredients. Using an electric mixer fitted with the paddle attachment or a wooden spoon by hand, cream together until smooth. If using a mixer, start on low speed just to incorporate everything together and then whip on medium speed to smoothen the mixture out. Add another tablespoon of maple syrup if you want to thin out the icing to reach your desired consistency.
- While the cinnamon rolls are still warm, spread the icing on top. It'll melt slightly and make them extra gooey!
Notes
* To make overnight cinnamon rolls, follow all of the steps up to and including cutting the rolls and arranging them in your baking pan (step 13). BEFORE allowing the rolls to rise for 45 minutes, cover them with plastic wrap and transfer to the fridge. The cold fridge will significantly slow down the rise, allowing the rolls to sit for longer before baking.
When it's time to bake overnight cinnamon rolls, take them out of the fridge and set them out at room temperature (still covered) for about 1 hour or until the rolls are no longer cold to the touch. The rolls may not puff up quite as much as they would if they were fresh but that's OK. Continue on with the rest of the recipe as normal.
- Prep Time: 40 minutes
- Cook Time: 25 minutes
- Category: Breads
Enjoy!


Add a Comment