
These are the BEST gooey brownies around! They are SO seriously gooey, rich and MOIST - they are NOT for the faint of heart. They virtually melt in your mouth and kind of feel like eating brownie batter - but they're fully cooked!

what's the difference between this and my other brownie recipes?
I have a few different brownie recipes on my website, but I would say this recipe is most comparable to my best fudgy brownies recipe and brown butter brownies recipe. So what makes this one different?
My best fudgy brownies are designed to be fudgy but NOT gooey! That's where the main different arises. The main difference between these brownies and my brown butter brownie recipe is the brown butter, but they also have slightly different ingredients and amounts.
This is the brownie recipe to make if you're someone who likes an unbelievably ooey and gooey and moist in the center brownie. I've made this recipe a million times, and even when I overbaked them, they STILL came out so insanely gooey.
My best fudgy brownie recipe is great for anyone looking for a bit more of an airy and well done brownie, without compromising the fudge factor! My brown butter brownie recipe is the perfect in between recipe - offering a both fudgy and gooey center, with a subtle little something extra (the brown butter) to make them extra special!

what makes these brownies SO GOOEY?
- An extra egg yolk: Egg yolks add more density and richness to the brownies thanks to their high fat content. This make the brownies EXTRA fudgy and gooey!
- Oil: This helps add some moisture and also helps protect the brownies from overbaking. This not only makes this recipe more fail-proof, but it also allows the brownies to keep for longer without drying out (because oil does not solidify as it cools like butter).
- Low ratio of flour: We're using the bare minimum amount of flour here to keep the brownies extra tender and moist! Flour can weigh down brownies, and although we are looking for dense and fudgy, we're NOT looking for flat and dry.
- Chocolate chunks: These are optional, but HIGHLY recommended! These add some extra melty pockets of chocolate which just makes the brownies feel extra gooey. I highly recommend chopping up a chocolate bar for this because it will bake up gooier than chocolate chips - but chocolate chips still work in a pinch.

how to line a baking pan for brownies
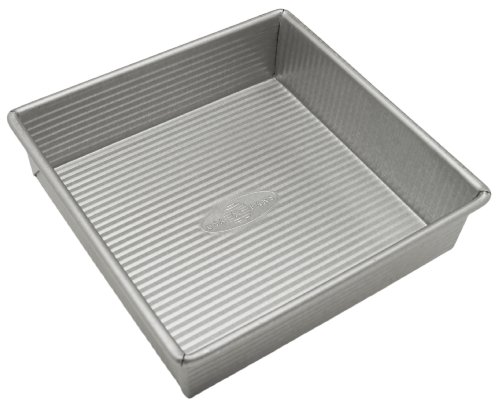
This is probably the easiest way to prep a baking pan for brownies and it makes it super easy to pull the baked brownies out later! It also only uses a single sheet of parchment paper, but fully covers the bottom and sides of the pan without the need for additional waste.
- To start, you'll need to grease your pan with either butter or oil. I personally prefer butter because I find the parchment paper sticks better to it. Although the pan will be almost fully covered with the parchment paper, greasing the pan will help the parchment paper stick and stay in place, and it will also keep the brownies from sticking to any possible exposed portions in the pan.
- Next, tear off a piece of parchment paper that's slightly larger than your pan. As a good general rule of thumb, the parchment paper should be the size of your pan + twice the height of the sides. So for example: if my pan is 8x8 inches with 2 inch high sides, my parchment paper should be about 12x12 inches (8+2+2). It doesn't have to be exact but just roughly! This helps ensure the parchment paper is large enough to cover the bottom and go up each one of the sides of the pan. The parchment paper on the sides will be a helpful little handle you can use to pull the baked brownies out later.
- Now it's time to cut! Lay the piece of parchment paper over your pan - try to center it as best you can. Next, cut off each corner with 2 snips to create an inward 90° angle. You can see what I mean in the photo below (on the left):


- Push the parchment paper down in the center and it should easily mold into the pan. Press the bottom and sides to adhere the paper to the greased pan - and you're all set!
perfectly baked brownies
While all of the steps to making brownies are very straight forward and are quite forgiving in the event of a mistake, over or underbaking brownies is a sure fire way to ruin the entire batch! If you find the brownies are too puddly and gooey, then they needed a bit more time in the oven. If you find the inside is dry or cakey, it means the brownies were overbaked. Although this recipe is very forgiving if you accidentally overbake the brownies, it's still important to watch out!
When testing brownies, the skewer test is one of the easiest ways to check for doneness. A skewer inserted into the center of perfectly baked brownies should NOT come out clean! A perfectly baked brownie will leave behind some fudgy, moist crumbs on the skewer but it shouldn't have any wet batter on it.


how to get clean slices
Because these brownies are so ooey and gooey, they can be a bit more difficult to slice. So here are a few of my favorite tricks for cutting up these brownies:
- Cool completely: The brownies will be virtually impossible to slice when they're warm, so make sure you let them cool completely in the pan before slicing into them. This will allow the fats and sugars to solidify, making for a much cleaner slice!
- Use a sharp knife: I don't feel like this one needs much explanation, but ohhh what a difference a sharp knife can make! On the topic of knives, I'd also recommend using a larger, thinner knife with a straight edge so you don't have to saw back and forth to get it to cut through.
- Grease the knife: This is super helpful with a brownie recipe that's as moist as this! A lightly oiled knife will glide much more smoothly and will disturb the brownie less than a dry knife.
- Cut straight down: If you try to saw back and forth while cutting, the brownie will break apart and the slices will have jagged edges. So when cutting, position the knife where you'd like to slice and just go straight down. Once it's cut through, carefully slide the knife out from the brownie horizontally. If you find it's easier to maneuver, stick to smaller cuts instead of trying to cut through the entire length or width of the brownie.
- Clean the knife between cuts: Gooey brownies will always leave behind some residue on the knife after cutting (you can see what I mean in the photo below!), so make sure to wipe that off between slices to ensure the next cut can glide down smoothly. After wiping the knife clean, don't forget to grease it again.


storing brownies
To keep brownies moist, avoid slicing them until you're actually ready to serve them. The less air the center of the brownies are exposed to, the longer they'll keep! When storing sliced or unsliced brownies, keep them in an airtight container or plastic bag - again, to reduce the amount of air they're exposed to! You can also cover them tightly with plastic wrap if you prefer.
Brownies will keep for about 3 days at room temperature. They can also be stored for up to 1 week in the fridge. The fridge will cause the brownies to firm up, so I recommend allowing them to come back up to room temperature before serving so they're soft and tender.
check out these other recipes!
• Brownie Cupcakes
• Lemon Brownies
• Red Velvet Brownies
• Cheesecake Bars
• Chocolate Peanut Butter Fudge Bars
Lastly, if you made this or any of my recipes, be sure to leave a comment and review below! I love hearing your thoughts! Also tag me on Instagram @eatsdelightfulblog so I can see what you're making.
watch how to make the BEST gooey brownies

BEST Gooey Brownies
- Total Time: 2 hours 48 minutes
- Yield: 16 bars
Description
These are the BEST gooey brownies around! They are SO seriously gooey, rich and MOIST - they are NOT for the faint of heart. They virtually melt in your mouth and kind of feel like eating brownie batter - but they're fully cooked!
Ingredients
- ½ cup (115g) unsalted butter
- 6 ounces (170g) semi-sweet chocolate, finely chopped
- 1 ¼ cups (250g) light brown sugar, packed
- 3 large eggs + 1 egg yolk, room temperature
- 3 tablespoons vegetable oil
- 1 teaspoon pure vanilla extract
- ½ cup (40g) unsweetened cocoa powder
- ¼ teaspoon salt
- ½ cup (65g) all-purpose flour, spooned and leveled
- 1 cup (6oz / 170g) semi-sweet chocolate chunks
Instructions
- Preheat your oven to 350F. Butter an 8x8 inch baking pan and line the bottom and sides with parchment paper. Leave a bit of excess parchment paper hanging over the sides of the pan to make it easier to pull the baked brownie out later.
- In a medium saucepot, add butter and place over medium heat. Cook until the butter is fully melted.
- While the butter is still hot, add chopped chocolate and whisk until the chocolate is melted and everything is smooth. Set aside to cool until it's no longer hot (it's ok if it's warm).
- In a large bowl, combine sugar and eggs. Using a whisk by hand or an electric mixer fitted with the whisk attachment, whip the eggs and sugar until pale and the sugar has dissolved. To test, grab some of the mixture from the bottom of the bowl (that's where any undissolved sugar will be) and rub it between your fingers. It shouldn't feel gritty.
- Add in the vegetable oil, vanilla, cocoa powder, salt, and the cooled butter / chocolate mixture into the egg mix. Whisk until combined.
- Add the flour and chocolate chunks and mix until streak free. Take care not to overmix or the brownies will come out tough!
- Pour the batter into your prepared pan and spread into an even layer.
- Bake the brownies in the center of your oven for 28 to 32 minutes or until a skewer inserted into the center comes out with a few fudgy crumbs, but no wet batter.
- Cool the brownie completely in the pan then use the overhanging parchment paper to pull it out and onto a cutting board.
- For clean slices, lightly oil a sharp, straight edged knife and cut going straight down. Avoid sawing back and forth or this can create uneven edges. Clean the knife and regrease it between slices. Enjoy!

- Prep Time: 20 minutes
- Bake Time: 28 minutes
- Category: Brownies

Enjoy!


Jenny says
Hi, I made these brownies. Magnificently delicious! They do more than melt in your mouth...I will be making these alot. So thank you
Mimi says
Hi Jenny! Thank you so much for your sweet review 🥲 I'm so happy you liked them!!
Kailyn says
10/10 will make again!
Liz says
Best brownies ever!
I’ve made these too many times to count now and every time they’re so delicious. I definitely say put it in all the sugar and butter because otherwise they don’t taste as good, trust me.
Love this recipe so much!
Bab says
Hi Mimi,
I have a question! I made these once before and they came out amazing, with such a nice crinkle top. Made them again but this time, they took longer in the oven because the middle wasn't setting, which ended up making the edges drier. The only different thing I did was use milk chocolate instead of semi sweet, but do you know what could have went wrong?
Bab says
Oh, just reread the recipe and realized I use paddle attachments instead of whisk to beat the egg and sugar mix. Perhaps this is why they didn't come out like last time.
Mel says
These are so delicious! My family asks for them all the time! Thank you so much 😊
Mudra says
Hello I'm vegetarian so i dont want to add egg so recipe result will be same as yours without egg
Angel Cunningham says
Question: Can I use butter instead of vegetable oil?
Angel Cunningham says
Question: Can I use better instead of vegetable oil?