
4 ingredients and barely any work is all you need to make these super easy Biscoff ice cream sandwiches! They're made up of Biscoff cookies sandwiching creamy homemade ice cream that's also packed with cookie butter flavor and made without an ice cream machine.

how does this no churn ice cream work?
This Biscoff ice cream base is made using 3 simple ingredients and produces a perfectly creamy filling without the need for an ice cream machine. One of the easiest ways to make ice cream without a machine is by using whipped cream. The whipped cream incorporates air into the ice cream mixture which helps keep it light, airy, and creamy. It replaces an ice cream machine's process of constantly stirring (or churning) the mixture to incorporate air into it.
Unlike most no churn ice cream recipes, this one is made using powdered sugar instead of sweetened condensed milk. The powdered sugar helps the ice cream center set into a more sliceable consistency and it's also just more of a common household ingredient (I ALWAYS forget to buy sweetened condensed milk).

how to make Biscoff ice cream
Before starting, I recommend chilling your mixing bowl in the freezer for about 10 minutes to get it nice and cold. You could skip this step, but a colder bowl will make it easier and quicker to whip up the ice cream mixture. To make the Biscoff ice cream filling, you'll need 3 ingredients:
- Heavy cream: Make sure the heavy cream is COLD and straight from the fridge. Cold heavy cream whips up faster and sturdier.
- Powdered sugar: I mentioned above that we're using powdered sugar instead of sweetened condensed milk in this recipe. Sweetened condensed milk is typically used to prevent crystallization in the ice cream, but in this recipe, it's the crystallization that comes from using powdered sugar that will make these bars easier to cut, handle, and serve! And don't worry: the ice cream is still perfectly creamy. It's kind of the same idea as when you make an ice box cake!
- Biscoff butter: After whipping together heavy cream and powdered sugar, the last step to making the ice cream is to fold in the Biscoff butter. The whipped cream will deflate slightly as you mix in the cookie butter, but take care not to over mix. If the cream deflates a lot, the ice cream will be dense and firm.


assembling the ice cream sandwiches
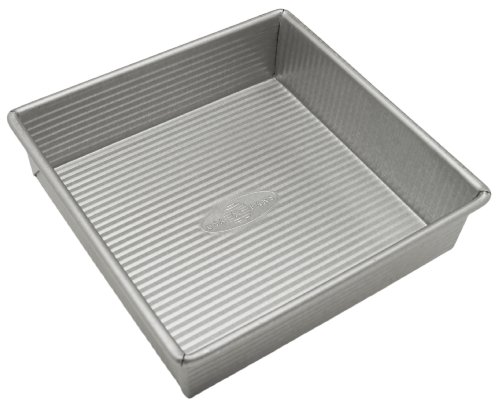
Before starting, prep an 8x8 inch freezer safe pan by lining the bottom and sides with parchment paper. Leave a little bit of the parchment paper hanging over the edges of the pan as a little handle that you can use to pull the bars out once they've frozen.
To layer the bars, start by arranging Biscoff cookies (face down) in the bottom of your pan. It should fit 12 full cookies and a half cookie. Use a spoon or cookie scoop to drop dollops of the whipped cream mixture evenly on top of the cookie layer, trying your best to cover the cookie bottom. Use a spoon or spatula to smoothen the top into an even layer. If you were to drop the whole mixture into the center then try to spread it into an even layer, this could disturb the bottom layer of cookies. Finally, arrange the top layer of cookies (this time face up).


Once the bars are layered in the pan, pop them into the freezer until the ice cream has fully frozen and set. They need at least 6 hours in the freezer but I personally like to leave them overnight.
After they've frozen, use the overhanging parchment paper to carefully pull the bars out of the pan and onto a cutting board. If they don't easily slide out when you gently tug on the parchment paper, wait 5 minutes to let the edges thaw slightly then try again. Use a sharp knife to cut into bars.

more tips
- Whipping the ice cream: When making the ice cream base, watch out for over or under whipped cream. Overwhipped cream will be gritty and (after a certain point) can become watery. Under whipped cream will lead to a looser ice cream base that, once frozen, will solidify into an icier consistency and will be less creamy and airy.
- Cookie to ice cream ratio: These ice cream sandwiches have a THICK ice cream layer. That being said, if you prefer a thinner layer of ice cream, you can either half the ice cream recipe or double the number of cookies and assemble them in a larger pan.
- Freezing: Make sure you give the cookie bars enough time in the freezer to make sure they're nice and set for cleaner slices.
- Storage: The best way to store these ice cream sandwiches is in an airtight freezer container so they maintain freshness. Line the bottom of your container with parchment paper to keep the bars from sticking. If you need to stack ice cream sandwiches, separate layers of the bars with a sheet of parchment paper so they don't stick to each other. These will keep for up to 3 months in the freezer.


check out these other recipes!
• No Bake Biscoff Cheesecake
• Giant Lemon Cookie Cake
• Fresh Strawberry Cake
• Oreo Balls
• No Bake Chocolate Biscuit Cake
• Nutella Chocolate Lava Cookies
Lastly, if you made this or any of my recipes, be sure to leave a comment and review below! I love hearing your thoughts! Also tag me on Instagram @eatsdelightfulblog so I can see what you're making.
Print
Biscoff Ice Cream Sandwiches
- Total Time: 6 hours 20 minutes
- Yield: 12 bars
Description
4 ingredients and barely any work is all you need to make these super easy Biscoff ice cream sandwiches (made entirely from scratch and without a machine!)
Ingredients
- 2 cups (480mL) heavy whipping cream, cold
- ⅔ cup (87g) powdered sugar
- ½ cup (165g) Biscoff creamy cookie butter
- 25 Biscoff cookies
Instructions
- Line the bottom and sides of an 8x8" pan with parchment paper, leaving a bit of parchment hanging over the sides as a little handle to pull the ice cream out later. Set aside.
- Place a large mixing bowl into the freezer for 10 minutes before starting - this will help the ice cream base whip up more easily and sturdily.
- Into the chilled bowl, pour in cold heavy cream and powdered sugar.
- Using an electric mixer fitted with the whisk attachment, whip on high speed until it reaches stiff peaks. Take care not to overmix.
- Add the cookie butter and mix on medium for an additional minute or until combined.
- Arrange 12 Biscoff cookies closely together in the bottom of your pan with the top sides facing down. You'll have a little corner in the pan that's uncovered by the cookies, so you can split an additional cookie in half to cover it.
- Next, top the bottom layer of cookies with the whipped cream mixture. To do this, drop dollops over the cookies so they're about evenly covered then use a spatula to smoothen out the top. If you try to drop the entire ice cream mixture into the center and spread it out to the corners, it may shift the cookie layer.
- Lay the remaining cookies on top, this time with the tops facing up.
- Cover the pan with plastic wrap and chill in the freezer for at least 6 hours or preferably overnight.
- Use the overhanging parchment paper to pull the bars out of the pan and onto a cutting board. Use a sharp knife to cut in between the cookies to create 12 bars then return any extra ice cream sandwiches to the freezer until serving time.

- Prep Time: 20 minutes
- Freeze Time: 6 hours
- Category: Ice Cream

Enjoy!


Strawberry says
Hi! I absolutely love this idea. I also never have sweetened condensed milk in my pantry. Would you happen to have an Oreo version of this recipe? Using powdered sugar instead of the condensed milk? Thank you!