
Upgrade your classic brownies with brown butter! These beauties are super dense, fudgy, and decadent with that famous crackly top that we know and love. They're perfectly rich and chocolatey but not sickeningly sweet and made entirely from scratch!
* This post was updated with new photos and more tips - but the recipe is the exact same! *
If you're looking for a super basic, simple, delicious brownie recipe, then I HIGHLY recommend trying my oldie but goodie fudgy brownie recipe (which only uses cocoa powder in the batter).
THIS brownie recipe is kind of the bells and whistles version. This recipe uses a mix of cocoa powder and melted chocolate and doesn't feature any baking soda to make for an extra dense, fudgy brownie!
And of course, the brown butter adds a beautiful flavor to an already iconic dessert!

Jump to:
how do these brownies taste?
These brownies have the same deliciously dense texture and chocolaty taste as any classic brownie recipe, but the addition of brown butter makes for a subtle toasty flavor that's just heavenly.
They're the perfect balance of sweet yet bitter, dense yet chewy, and rich yet subtle. They really are one of my favorite brownie recipes (and that's saying something!) and are well loved by anyone who tries them!

brown butter brownie ingredients
• butter: The starting point of any incredible brownie recipe! Regular melted butter is part of what makes a brownie so dense, fudgy, and rich - but BROWN butter takes everything to the next level. It adds a delicious toasty flavor and makes the brownies extra fudgy (because the water from the butter gets cooked out in the process of browning).
• chocolate: You'll need some for the actual brownie batter and some to fold into the batter once it's done. You can use chocolate chips or chocolate chunks for folding into the batter - but if you can, a chopped up chocolate bar makes for a gooier, meltier brownie!
• sugar: a mix of brown and granulated sugars make the perfect balance of crisp yet moist and fudgy brownies!
• eggs & vanilla: The remaining wet ingredients for this recipe. The eggs add some extra richness and structure while the vanilla is for flavoring.
• cocoa powder: I always use unsweetened cocoa powder but you can also use Dutch process cocoa for this recipe. There's not a huge difference between the two in a recipe like this aside from the fact that Dutch processed will make for slightly darker colored brownies.
• flour & salt: Aside from the cocoa, you'll need flour and salt for the dry ingredients to finish up the brownie batter.

how to make brown butter brownies
* As always, you can find the full recipe details further below in this post. But here's a quick look at how these brownies are made:
1. Brown butter. This simply involves cooking butter until it starts to bubble and simmer then eventually browns.
2. Whisk chocolate into the warm butter to melt. Try to work relatively quickly otherwise the butter can burn from the residual heat of the pan. Once you add the chocolate, it will cool down the butter a bit and melt into a smooth mixture. Set aside to allow it to finish cooling while you work on the rest of the batter.


3. Whisk together sugars and eggs until the sugar is dissolved. To test if they're mixed well enough, rub some of the mixture between your fingers - it shouldn't feel grainy. You can do this by hand with a whisk (if you want a workout) or using an electric mixer fitted with the whisk attachment.
4. Whisk in butter mixture, vanilla, cocoa powder, and salt. The butter mixture should have cooled quite a bit in this time but it's ok if it's still a little warm.
5. Mix in flour and chocolate chips / chunks until just combined. Don't overmix! You're just looking for the batter to be streak free. It will be a bit thick.


6. Pour the brownie batter into a greased and parchment lined baking pan. Spread the batter into an even layer from corner to corner.
7. Bake until crackly on top and a skewer inserted into the center comes out with a few fudgy moist crumbs.
8. Cool completely in the pan before pulling out and slicing. If desired, sprinkle some flaky sea salt on the bars!


how to tell when brownies are baked through
A skewer test is the best way to check doneness of brownies. But unlike cakes and muffins, the skewer should NOT come out clean - that would mean your brownies are overbaked and will harden significantly when cooled.
They'd still be edible... but super firm and a little dry. Basically, not a whole lot of fun to eat.
A skewer inserted into perfectly baked brownies should come out with moist, fudgy crumbs. A skewer inserted into underbaked brownies will come out wet, with little to no crumbs and a smoother looking batter on the tip.
Recipe for Perfection has a really nice post that goes into more detail and shows you what each skewer test looks like! Check out their post here.
Just do keep in mind that if you added chocolate chips or chocolate chunks to your brownie batter, the skewer may come out with melted chocolate on the tip. In that case, it's best to test the batter in 2 or 3 different locations to be sure.

tips
Use good quality chocolate. It makes all the difference in flavor and meltiness when you melt it with the browned butter.
Measure flour carefully. If you have a food scale, I always recommend measuring by weight because it is the most accurate. If you prefer to use cups, use a spoon to scoop the flour into your measuring cup. Don't scoop the measuring cup itself directly into the bag of flour or it can pack the flour in and dry out the brownies!
Watch your mixing. The key to achieving a perfectly crackly top is whisking your sugars and eggs together until the sugar is dissolved. This will take 5 to 7 minutes by hand or 3 to 5 minutes with an electric mixer. So avoid undermixing at this stage. Once the flour is added to your batter, that's when you need to watch for overmixing as this can cause your brownies to end up dense (like, hockey puck dense) and dry.
Avoid over or underbaking. The number one way to ruin an otherwise amazing brownie experience!
Cool completely before slicing the brownies. They're super soft when they come out of the oven and it'll basically be impossible to cut clean slices while they're still warm!
Slice with an oiled knife. These brownies are FUDGY. The only downside is the fact that they stick to the knife as you're trying to cut them. Lightly brushing the knife with oil helps a ton - and make sure to wipe the knife and re-oil it between cuts to remove any stuck on brownie crumbs.
storage
Let the brownies cool completely to room temperature then keep brownies stored in an airtight container or plastic bag with the air pushed out and sealed well. You can also tightly cover a plate of brownies with plastic wrap. The key is to allow in as little air as possible so the brownies keep for longer!
These brownies will keep for up to 4 days at room temperature or 1 week in the fridge. If you store them in the fridge, they will be quite firm if you serve them cold. So it's best to let them come up to room temperature before enjoying!
If you like a gooier brownie, they're best served the same day or warmed. For a more set, fudge brownie, let them cool completely to room temperature, cover tightly, and let sit for a few hours or overnight.
Check out these other recipes!
• Nutella Lava Cookies
• Skillet Nutella Brownie
• BEST Gooey Brownies
• Turtles Brownies
• Brown Butter Chocolate Chip Muffins
• Brown Butter Zucchini Muffins
Lastly, if you made this or any of my recipes, be sure to leave a comment and review below! I love hearing your thoughts! Also tag me on Instagram @eatsdelightfulblog so I can see what you're making.
Print
Brown Butter Brownies Recipe
- Total Time: 1 hour 45 minutes
- Yield: 16 bars
Description
Upgrade your classic brownies with brown butter! These beauties are super dense, fudgy, and decadent with that famous crackly top that we know and love.
Ingredients
- 10 tablespoons (150g) unsalted butter, cut into 10 slices
- 6 ounces (170g) chopped semi-sweet chocolate, good quality *see notes
- ¾ cup (150g) granulated sugar
- ½ cup (100g) packed brown sugar, light or dark
- 3 large eggs, at room temperature
- 1 teaspoon pure vanilla extract
- ½ cup (45g) unsweetened cocoa powder
- ½ cup (65g) all-purpose flour, spoon and leveled
- ¼ teaspoon salt
- 1 cup (170g) semi-sweet chocolate chips or chunks (optional)
- flaky sea salt (optional - for topping)
Instructions
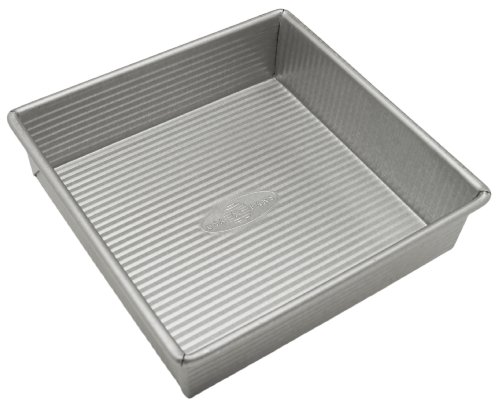
- Preheat your oven to 350°F. Grease and line an 8x8 inch baking pan with parchment paper, leaving a bit of paper hanging over the sides to make it easier to pull the baked brownies out. Set aside.
- In a medium saucepot, add butter slices and place onto a stove burner set to medium heat. Heat, stirring constantly, until the butter melts and turns a light golden brown color. It will foam quite a bit, but it should settle down once the butter is ready to take off the heat. This will take about 5 to 8 minutes from start to finish.
- Working relatively quickly so the butter doesn't continue browning from the residual heat of the pan, whisk in chopped chocolate until melted and smooth. Set aside to cool slightly.
- In a large bowl, combine both sugars and eggs. Using an electric mixer fitted with the whip attachment or a whisk by hand (it is a workout though!) whisk together sugars and eggs until the sugar is dissolved. This will take around 5 to 7 minutes. To test if it's ready, rub some of the mixture between your fingers. It shouldn't feel grainy.
- Add your vanilla, cocoa, and slightly cooled brown butter mixture to the egg mix. Whisk to combine.
- Add flour, salt, and chocolate chips to the wet ingredients. Mix together until just combined. Take care not to overmix!
- Pour your batter into the prepared baking pan. Bake in the center of your preheated oven for 25 to 30 minutes or until the top is no longer shiny and a skewer inserted into the center comes out with fudgy, moist crumbs.
- Cool completely in the pan. Once cool, use the overhanging parchment paper to pull the brownies out and cut into 16 slices. (Optional) Sprinkle some flaky sea salt on top before serving!


Notes
* Good quality chocolate makes all the difference in flavor and texture! If you can swing it, try to use Baker's or couverture chocolate, which is specifically made for melting / baking.
- Prep Time: 15 minutes
- Bake Time: 30 minutes
- Category: Brownies

Enjoy!


Vendula says
Delicious! I’m glad I found it on Pinterest❤️
Abby S. says
Hubby and I agree that these were the best brownies we’ve had! This will definitely be our go to recipe now!
Courtney says
very good, but mine took around 30 minutes to bake!
Julia says
Made these and they were incredible of course. They're brownies... you can't go wrong! I usually use brown butter when baking because it is such an easy way to level them up.
I put mine in 2 metal loaf pans since I was separating them for my dad and grandma and they needed the full 30 minutes. I started with 20, thinking they'd cook faster but they were still in the full goop stage.
(I did modify my recipe, but if anything thought they would bake faster- I lined the center of the brownies with PB Oreos and fit mini Reeces pb cups wherever they fit between the Oreos. Also used 1/3 cup regular cocoa powder and 1/4 cup black cocoa powder)
Melanie Beers says
Lemme just say.. although a bit time consuming.... these brownies are worth it!. Rich chocolate, not too sweet, fantastic and light texture. 😋 Just delicious 😋
Stefanie says
These were excellent. I don’t know if I will ever make boxed brownie mix again! My kids have already requested this brown butter version again. I baked just shy of 30 minutes, was a little nervous that it was underbaked and poked a ton of holes checking it, but it was perfectly fudgy. Turns out I’ve just been making brownies wrong my whole life. 🙂 To cover up all my holes from the toothpicks I dusted a layer of powdered sugar on top.
Sheryl says
Best brownie recipe ever. So deep & delicious!
imogen says
my first time making brownies and these were genuinely the nicest brownies i’ve ever had nothing compares!!!
Alexis says
I made these and they were rich and gooey! Great homemade brownies. I did use coconut palm sugar in place of regular sugar and they turned out just fine.
Kimberly says
these were DELICIOUS i highly recommend this recipe! i didn’t tell my boyfriend what was different about the recipe, but he could still tell that the flavor was way enhanced by the brown butter. make these brownies!!!