
The classic warm and cozy holiday drink transformed into a soft and spongy cake! This caramel brûlée latte cake is as delicious as it is beautiful. It's made up of a spongy espresso cake that's soaked in a caramel espresso milk and topped with whipped cream, MORE caramel, and burnt sugar pieces! It's truly a timeless holiday cake and such a unique recipe to make!

what is caramel brûlée latte cake?
This is the classic holiday drink turned into a cake! This cake has all the flavors and components that you'd find in a caramel brûlée latte: caramel and espresso, a whipped cream frosting, and a burnt sugar top! Here's a closer look at the different components going on in this cake:
- Homemade caramel sauce: This recipe starts with a homemade caramel sauce that's used as a soak for the baked cake and for drizzling on top of the frosted cake! It's such an easy recipe to whip up and adds plenty of flavor.
- Brown sugar espresso cake: Next up, is the cake! This cake is flavored with espresso and dark brown sugar for a warm, cozy, and moist bite. It's perfectly dense so it can withstand the caramel soak that comes next, but still so tender and soft.
- Caramel espresso soak: After the cake is baked and cooled, it's pierced with a toothpick and drizzled with a soak made from the caramel sauce, espresso, and milk. This adds SO much latte flavor to the cake AND it makes it so so moist.
- Whipped cream: What's a caramel brûlée latte without whipped cream on top? This cake is finished off with a simple sweetened whipped cream. Not only does it help channel those latte vibes, but it also just pairs better with this cake than any other frosting I tried. It's a delicate cake so a light and delicate whipped cream was clearly the best frosting to use.
- Burnt sugar topping: After the cake is frosted, it's time for the finishing touches. You can just drizzle the homemade caramel sauce on top and have a perfectly delicious cake, but to get the "brûlée" aspect, I also cooked a bit of dry sugar in a pot until it turned amber then let it cool until it hardened. It's then whacked to create little shards that are sprinkled on top of the cake! It adds crunch, more burnt sugar flavor, and just makes it look a little extra fancy.

best coffee for caramel brûlée latte cake
The coffee is one of the main flavors in this cake, so pick something you actually enjoy drinking! I used a double shot of espresso brewed in my Nespresso machine, but really any coffee will work. If you have a favorite instant coffee blend, you can dissolve that in some boiling water and use it. The only important things to consider are 1) choose something with a flavor you like and 2) avoid overly complex blends as they may not pair well with the other flavors in this cake!
working with homemade caramel
This cake starts with the homemade caramel sauce. It's very easy to make, but there are a few key things to keep in mind to ensure it comes out perfect! I have a ton of step by step photos and instructions in my homemade caramel sauce recipe HERE, but here's a quick rundown of some key tips for caramel success!
- Measure out your ingredients first: Caramel sauce comes together quite quickly and it can easily go from perfectly browned to burnt. You won't really have time to measure anything out in between steps. In order to ensure it all comes together smoothly, prep ALL of the ingredients before starting.
- Use a heavy duty pot with high sides: When you introduce new ingredients into the sauce, it'll bubble up and almost triple in volume. So choosing a pot that has high sides ensures the caramel doesn't overflow. Using a heavy duty pot helps ensure the bottom of the caramel doesn't burn.
- Don't stir the sugar... at first: At the beginning of the recipe when you cook together water and sugar to caramelize, it's important to not stir at this stage or the sugar can crystalize. If needed, gently swirl the pan to help everything evenly brown. Once you add the butter, then you can start whisking.
- Stay close by: I mentioned that caramel sauce can very quickly go from a perfect color to burnt, so keep a close eye on it! It won't look like a lot is happening at first, but as soon as it starts browning, everything comes together very quickly.
- Cool completely before using: Using hot or warm caramel on the cake can impact its texture, so make sure the sauce is fully cooled to room temperature before using.


how to make caramel brûlée latte cake
The next component is the brown sugar espresso cake. This cake is perfectly soft and spongy but still sturdy enough to hold up to the caramel soak and latte inspired toppings! The process of making the cake is very straightforward, but there are a few things to keep in mind to ensure it comes out perfect:
- Use room temperature ingredients: This helps ensure the batter whips together smoothly and bakes up perfectly. Using cold ingredient can lead to an uneven and bumpy cake texture. It's also not a good idea to use overly warm ingredients or it can cause the cake to bake up greasy. Typically, setting the ingredients out for 1 hour at room temperature will get them to the perfect temperature (although this can vary slightly depending on how warm your home is).
- Measure flour carefully: No brainer, right? But flour is actually very easy to mismeasure - specifically if you're using cups. Using a scale to measure the flour is always the most accurate way to ensure you have the right amount, but if you prefer to use cups, make sure you don't scoop the cup directly into the bag of flour. This can pack in more weight. Instead, use a spoon to scoop spoonfuls into your measuring cup then use a flat utensil to level off any excess.
- Be careful not to overmix the batter: Overmixed batter can create a dense and dry cake and this is especially the case once you add in the flour. Overmixing can also cause the center to sink after baking and is really just unnecessary added work! So stop mixing as soon as the ingredients seem well combined. The batter should have a few small clumps once it's ready but will more or less be smooth.
- Cool the cake completely in the pan: Before poking the surface of the cake and pouring over the caramel coffee soak, make sure the cake has fully cooled beforehand. The cake will be too fragile to poke holes into when it's warm and it'll also be more absorbent and more likely to oversoak.
- Chill the cake for a few minutes: The cake will be quite soft after pouring over the soak, so chilling it in the fridge for a few minutes helps it set slightly and makes it easier to transfer. It also makes the texture the perfect balance of moist and sturdy!


toppings and finishing touches
Once the cake is all ready, all that's left are the toppings. To really channel those latte vibes, this cake is frosted with a simple sweetened whipped cream and topped with more caramel sauce and little burnt sugar shards. It sounds complicated, but they're all super easy to make.
The whipped cream is made by simply whipping together all the ingredients until thick and pillowy. It's then ready to spread on top of the cake right away! I also like to add some milk powder to the whipped cream. This helps stabilize it and keeps it thick and pillowy for a longer period of time. If you want to leave out the milk powder, you can, but then the whipped cream is best made right before serving. Whipped cream that's not stabilized will soften overtime.
You should have some leftover homemade caramel sauce. So I like to pour it into a piping bag, snip a small piece off the tip, and drizzle swirls over the whipped cream. It really makes it look like a caramel latte!
Finally, the burnt sugar topping adds some pretty sparkle and some added texture. You can skip it if you prefer and you'll still have a perfectly delicious cake. But making the burnt sugar topping just involves adding sugar to a dry pan and then heating it until it melts and turns a rich amber color. It's then poured onto parchment paper and set aside for about 5 minutes to cool.
Once cool, it becomes like hard candy that you can break up into smaller shards and sprinkle over the cake! As it sits, the sugar will dissolve so this topping is best made right before serving.

how do you serve caramel brûlée latte cake
While most cakes are best served at room temperature, I find this is one that tastes better when it's cold. The chilled cake will firm up slightly but stay perfectly soft thanks to the caramel coffee soak. The result it a balanced cake that's plush and spongy but firm enough to slice! So before serving, I'd recommend letting the cake sit for about 1 hour in the fridge.
storing latte cake
Keep the cake covered with a cake dome or an inverted plate and stored in the fridge for up to 3 days. I find this cake is best served within 1-2 days but you can stretch it out for a third day. Anything longer than that and the cake will start to get a little too soft.
If you want the whipped cream to stay firm and fluffy for the full 3 days, I would include the milk powder to stabilize it. Otherwise, you can whip the cream fresh when you want to serve the cake. If you plan on including the burnt sugar topping, it can handle being in the fridge for a few hours, but as time goes on, it'll soften and melt from the moisture from the cake and fridge. For the best crunch and appearance, I would make the burnt sugar right before you plan on serving the cake.

check out these other recipes!
• Caramel Cheesecake
• Chocolate Caramel Poke Cake
• Caramel Gingerbread Cake
• Turtles Brownies
• Flan (Crème Caramel)
• Chocolate Espresso Cake
Lastly, if you made this or any of my recipes, be sure to leave a comment and review below! I love hearing your thoughts! Also tag me on Instagram @eatsdelightfulblog so I can see what you're making.
Print
Caramel Brûlée Latte Cake
- Total Time: 1 hour 30 minutes + cooling
- Yield: 1 (9") cake
Description
The classic warm and cozy holiday drink transformed into a soft and spongy cake! This caramel brûlée latte cake is as delicious as it is beautiful. It's made up of a spongy espresso cake that's soaked in a caramel espresso milk and topped with whipped cream, MORE caramel, and burnt sugar pieces! It's truly a timeless holiday cake and such a unique recipe to make!
Ingredients
Caramel Sauce:
- ¼ cup (60mL) water
- 1 cup (200g) granulated sugar
- 5 tablespoons (75g) unsalted butter, sliced
- ⅔ cup (160mL) heavy whipping cream
- ½ teaspoon salt
- 1 teaspoon pure vanilla extract
Brown Sugar Espresso Cake:
- 2 cups (260g) all-purpose flour, spooned and leveled
- 2 tablespoons cornstarch
- 1 teaspoon baking powder
- ¼ teaspoon baking soda
- ¼ teaspoon salt
- ½ cup (120mL) whole milk, room temperature
- 1 teaspoon white or apple cider vinegar
- ½ cup (115g) unsalted butter, softened
- ¼ cup (60mL) vegetable oil
- ¾ cup (150g) dark brown sugar, packed
- ½ cup (100g) granulated sugar
- 2 large eggs, room temperature
- 2 teaspoons pure vanilla extract
- ⅓ cup (80mL) strongly brewed espresso coffee, room temperature
Coffee Caramel Soak:
- ⅓ cup (80mL) strongly brewed espresso coffee
- ¼ cup (60mL) milk
- ½ cup (120mL) caramel sauce
- 1 teaspoon pure vanilla extract
Whipped Cream Frosting:
- 1 cup (240mL) heavy whipping cream, cold
- 2 tablespoons powdered sugar
- 1 teaspoon pure vanilla extract
- 1 tablespoon dry milk powder (optional) *SEE NOTES
Burnt Sugar Topping (Optional):
- ½ cup (100g) granulated sugar
Instructions
Caramel Sauce:
- Measure out all of your ingredients for the caramel sauce. Everything comes together rather quickly, so you won't have time to measure between steps!
- In a medium sized, heavy duty saucepot, combine water and sugar.
- Place the pot over medium heat and cook, without stirring, until it melts, boils, and eventually turns a rich amber color. Not a lot will look like it's happening at first, but it will brown suddenly - so don't walk away! If needed, gently swirl the pan to ensure even browning but (again) do not stir! Stirring can cause the sugar to crystalize at this stage.
- Working quickly (but carefully!), immediately after the sugar turns an amber color, move the pot off the heat and whisk in the sliced butter. The mixture will bubble up to almost triple in volume but settle down once the butter is melted.
- Add in the cream and whisk to combine. The mixture may clump up a bit at this point - that's fine!
- Return the pot to medium heat and cook until the mixture is fully melted and smooth.
- Move the pot off the heat and whisk in the salt and vanilla then pour the caramel into a heat safe bowl or cup. Set aside to cool completely to room temperature. It will thicken as it cools.
Brown Sugar Espresso Cake:
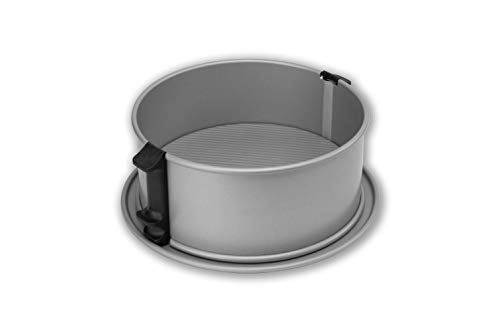
- Preheat your oven to 350F. Grease a 9" springform pan and line the bottom with parchment paper. Set aside.
- In a medium bowl, whisk together flour, cornstarch, baking powder, baking soda, and salt. Set aside.
- Mix together milk and vinegar in a measuring cup. Set aside for 5 minutes while you work on the rest of the cake.
- In a large bowl, combine butter, oil, brown sugar, and granulated sugar. Cream together until light and fluffy.
- Add in the eggs and vanilla and whisk to combine.
- Alternate mixing in the dry ingredients and milk and espresso. Start by mixing in about ⅓ of the dry ingredients, then mix in the milk mixture. Mix in another ⅓ of the dry ingredients, followed by the espresso, then finish off with the final ⅓ of the dry ingredients. Be careful not to overmix.
- Pour the batter into your prepared springform pan. Bake the cake in the center of your preheated oven for 40-45 minutes or until a skewer inserted into the center comes out clean with a few moist crumbs.
- Cool the cake completely to room temperature in the pan.
Coffee Caramel Soak:
- In a medium bowl or cup, mix together espresso, milk, caramel sauce, and vanilla.
- Use a toothpick or skewer to poke holes all over the surface of the cake to allow the coffee caramel mixture to properly seep through. See above post for visual.
- Slowly and evenly pour the coffee soak over the cake.
- Set the cake aside in the fridge for about 30 minutes to allow it to firm up slightly. Then remove the sides of the springform pan and slide the cake onto your serving tray. Keep the cake in the fridge while you prep the toppings.
Whipped Cream:
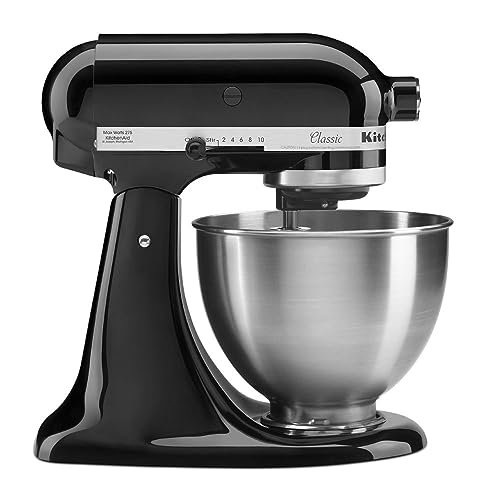
- In a large bowl, combine all the whipped cream frosting ingredients. Use an electric mixer fitted with the whisk attachment to whip the cream until it reaches stiff peaks.
- Spread the whipped cream over the cake and drizzle more caramel sauce on top.
- Keep the cake stored in the fridge. This cake is best served cold.
(Optional) Burnt Sugar Topping:
- The sugar shards will soften and melt as they sit, so make the burnt sugar topping right before you plan on serving the cake.
- Line a metal baking sheet with parchment paper and set aside.
- Pour sugar into a medium pot and place over medium-high heat.
- Cook, while stirring constantly, until the sugar melts and turns a rich amber color. Take it off the heat before it's fully browned to your liking - when you pour it into your baking pan, it will continue to brown slightly from the residual heat. Immediately pour the burnt sugar onto the parchment lined baking sheet. Be careful - the pan will be hot!
- Let it sit for about 5-10 minutes or until the sugar has fully cooled and hardened.
- Whack the sugar using a wooden spoon, rolling pin, or similar tool to break it up into smaller shards. Sprinkle over the frosted cake before slicing and serving!

Notes
* You can leave out the milk powder if you prefer, but it helps stabilize the whipped cream thus allowing you to store the frosted cake for longer. If you leave it out, I would wait until right before you plan on serving the cake to whip the cream or it will deflate as it sits.
- Prep Time: 40 minutes
- Cook Time: 10 minutes
- Category: Cakes
Enjoy!
Add a Comment