
Chocolate biscuit cake is one of the easiest, no fuss, tastiest desserts around! It's rich and chocolaty, with a nice crunch courtesy of the biscuits. No baking and minimal effort needed!

what is chocolate biscuit cake?
Chocolate biscuit cake (also sometimes referred to as "lazy cake") is a cake made up of a mix of simple chocolate sauce and broken up digestive biscuits. The 2 are mixed together then packed into a pan and chilled until set. The result is a cakey texture with a deep and rich chocolate flavor. When you slice into this beauty, you can see little bits of cookie suspended in chocolate - it's kind of reminiscent of salami cookies!
best cookies for no bake biscuit cake
Any sort of tea biscuit, digestive biscuit, or dry and crispy cookie would work for this recipe. Graham cracker cookies would also be delicious here! Do avoid any cookies that are soft, chewy, or crumbly - they don't hold up well to the chocolate sauce.

how to make chocolate biscuit cake
1. Whisk together sugar and cocoa powder in a medium pot. This helps break up any large clumps and gives you an all around smoother chocolate sauce!
2. Slowly whisk in milk. Pour a steady (but slow) stream of milk into the pot while whisking. Gradually adding in the milk also helps prevent clumping.
3. Add butter and cook. Bring the mixture up to a boil then simmer until it reduces slightly and thickens enough to coat the back of a spoon. Set aside to cool slightly.


4. Break up cookies into a bowl then toss in chocolate sauce. They should be evenly coated with the chocolate.


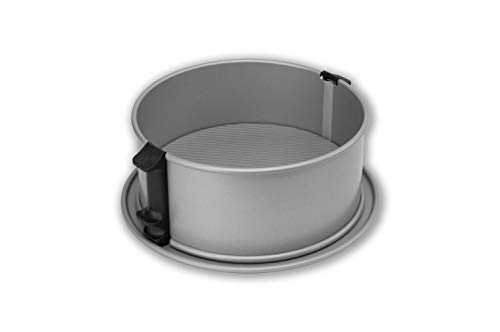
5. Pack into a springform pan. Even out the top as best you can and then chill the cake until firm. About 4 hours in the fridge should be enough or up to overnight.
6. Make the ganache: Heat cream until very lightly bubbling along the edges then pour over chopped chocolate. Let steep to soften the chocolate then whisk until smooth.
7. Unlatch the sides of the cake pan and pull your cake out and onto your serving plate.
8. Drizzle ganache on top and spread into an even layer. Slice and enjoy!


substitutions
- cocoa powder: I usually use unsweetened cocoa powder just because that's what I usually keep on hand, but Dutch processed cocoa also works. You can also use black cocoa powder for a dark Halloween-y twist!
- milk: You can swap the milk out for an equal amount of water. The cake will be slightly less creamy and rich, but still very VERY delicious! You can also use an equal amount of any non-dairy milk you like.
- butter: If you do decide to use water or non-dairy milk instead of regular whole milk, you can make this cake dairy free by swapping out the butter for vegan or dairy-free butter.
- cookies: I mentioned this above, but you can basically use any tea or digestive biscuit for this recipe. Graham crackers also work amazingly. Just keep in mind that if you're trying to keep this recipe egg free and/or dairy-free, watch out for the ingredients in whichever cookies you decide to use to make sure they also don't contain eggs/dairy.
- nuts: This is more of an add-in than it is a substitute, but this cake also tastes delicious with some nuts mixed in with the crumbled cookies. It brings some nice added flavor and a delicious crunch. You can use pecans, walnuts, almonds, pistachios, or whichever nuts you prefer. For this amount of cake, I would recommend adding in around 1 to 2 cups of chopped nuts - a little more or less is fine depending on how you like it!

tips
- cooking the chocolate sauce: Make sure to cook the chocolate sauce for long enough to reduce it to a slightly thicker consistency. This helps the cake set better! Around 10 minutes of simmering is usually the perfect amount of time.
- cooling the chocolate sauce: The chocolate sauce needs to cool slightly before being added to the cookies, otherwise it can over soften them. It's ok if the sauce is still a little hot when you pour it over the cookies, but it shouldn't be piping hot.
- crumbling the cookies: I find that cookies crumbled to roughly ¾ to 1 inch large pieces are perfect for evenly dispersing into the chocolate sauce without getting overly soft. They obviously won't be perfect and it's fine if some of them are slightly larger or smaller.
- picking the right chocolate for ganache: Try to use a good quality chocolate bar for the ganache and avoid chocolate chips. Chocolate chips typically have a coating added to the outside to help them keep their shape, which can lead to a grainy ganache. The best chocolate for ganache is anything labeled "Baker's" or "couverture" chocolate.
- heating the cream for the ganache: Be careful not to let the cream overheat or boil before adding it to the chocolate. Not only can this scorch the bottom of the cream, but overly hot cream can cause the chocolate to seize. If after adding the cream to the chocolate it hasn't quite melted fully, you can pop the mixture into your microwave or warm on a super low heat in a pot until melted and smooth. Again, take care not to overheat or the chocolate can clump up and become grainy.
storage
This no bake chocolate cake should be kept in the fridge until you're ready to serve, otherwise it'll soften and fall apart. Keep covered and this cake will last for up to 5 days in the fridge. Note that the longer the cake sits, the more the cookies will soften.
check out these other recipes!
- No Bake Biscoff Cheesecake
- Peach Cobbler Cheesecake
- Black Forest Cake
- Lemon Poppy Seed Cupcakes
- No bake Chocolate Peanut Butter Fudge Bars
Lastly, if you made this or any of my recipes, be sure to leave a comment and review below! I love hearing your thoughts! Also tag me on Instagram @eatsdelightfulblog so I can see what you're making.
Print
Chocolate Biscuit Cake
- Total Time: 4 hours 30 minutes
- Yield: 12 generous slices
Description
Chocolate biscuit cake is one of the easiest, no fuss, tastiest desserts around! It's rich and chocolaty, with a nice crunch courtesy of the biscuits. No baking and minimal effort needed!
Ingredients
For the biscuit cake:
- 1 & ½ cups granulated sugar
- 1 cup unsweetened cocoa powder (can sub for Dutch processed or black cocoa)
- 2 cups whole milk
- 12 tablespoons unsalted butter, sliced
- 1 teaspoon pure vanilla extract
- 600g digestive or tea biscuits (graham crackers also work!)
For the chocolate ganache topping:
- 6 ounces good quality semi-sweet chocolate, chopped (about 1 cup) * see notes
- ½ cup heavy whipping cream
Instructions
- For the chocolate biscuit cake: Line the bottom and sides of a 9 inch spring form pan with plastic wrap or parchment paper. Set aside.
- In a medium saucepot, combine the sugar and cocoa powder. Whisk to incorporate and break up any large pieces of cocoa.
- Gradually add your milk to the sugar and cocoa mixture, whisking well after each addition. Add the butter to the pot as well.
- Place the pot over medium-high heat. Cook, stirring constantly, until the butter has melted and the mixture starts boiling. Reduce heat to medium and simmer the mixture for about 10 minutes, stirring often, until it thickens enough to lightly coat the back of a spoon.
- Remove the pot from the heat and whisk in vanilla extract. Let the chocolate sauce cool for 20 minutes.
- In a large bowl, break up the digestive/tea biscuits into roughly ¾ to 1 inch sized pieces.
- Pour the chocolate sauce over the cookie pieces (it's ok if it's still a little warm). Stir until all of the cookies are coated in the mixture.
- Transfer the mixture to your prepared springform pan. Lightly pack the cookie mix into the pan.
- Cover and chill in the fridge for at least 4 hours or overnight to set the cake.
- For the chocolate ganache: Place the chopped chocolate in a medium sized bowl. Set aside.
- Pour the cream into a small saucepot and place the pot over medium heat. Warm the cream until it just barely starts to form bubbles along the sides. Don't boil! Pour the hot cream over the chocolate and let sit for 5 minutes to steep. Gently mix until smooth. ** (see notes)
- Pull your cake out of the pan and transfer to your serving plate or stand. Pour the ganache over the top and spread to cover the top of the cake. Slice and serve!

Notes
* It's important to use chocolate that's made for melting/baking and NOT chocolate chips. Melting chocolate is usually labeled "Baker's" or "couverture." Chocolate chips don't melt smoothly and can have a grainy final texture!
** If your chocolate doesn't fully melt after you pour over the cream, you can pop it into the microwave or pour it into a pot and warm over the lowest heat setting until melted.
Enjoy!
Add a Comment