
Combining 2 mouthwatering desserts! This chocolate chip cookie pie features a buttery and flaky pie crust with a gooey and rich chocolate chip cookie inspired filling. It's so deliciously warm and decadent and makes the perfect addition to any regular dessert table or your Christmas and Thanksgiving tables!

how to make homemade pie crust
You can use store-bought pie crust to save a bit of time, but it's actually really easy to make at home! Start by working the butter into the dry ingredients until you have chunks of butter that are slightly larger than a pea. Once the butter is mixed in, add ice cold water until the dough comes together into a ball. That's all there is to making the dough!
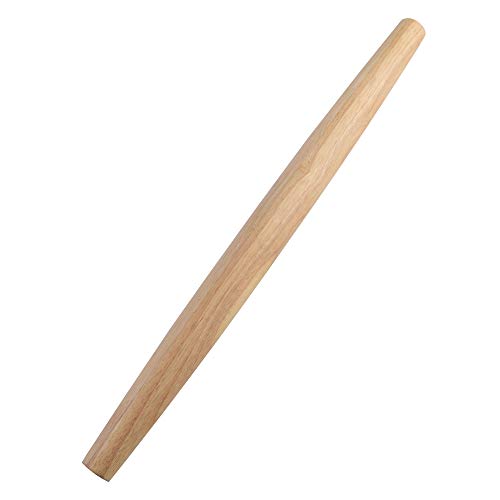
Shape the dough into a rough disk then wrap with plastic wrap. Refrigerate until firmed up (this makes rolling a million times easier and helps keep it flaky). Once it's chilled, roll the dough out into a rough circle that's about 2 inches larger than your pie plate.
Transfer the dough into your pie plate and gently push it down to press it into the bottom and up the sides of the pan. Cut off any rough edges and then crimp the sides with a fork. Set aside in the freezer to allow it to chill while you work on the filling.

how to make chocolate chip cookie pie
1. Whisk together wet ingredients for the cookie dough filling.
2. Fold in flour and chocolate chips until combined. That's all you need to do to make the filling! Just note that it will be a bit softer than your standard cookie dough.


3. Pour the cookie dough filling into your pie shell and bake.
4. Cool slightly before serving. While it's still hot from the oven, I like to sprinkle some extra chocolate chips on top so the heat from the pie will help melt and stick them to the surface.


choosing a pie plate
The material of your pie plate can impact the bake time and the final crispiness and color of the pie crust! You can use either metal, ceramic, or glass for the pie plate and each one offers its own advantages and disadvantages:
- Metal: Metal pie plates offer faster heat absorption which will give you a crispier and browner pie crust with an ooier and gooier filling (because the crust cooks a bit faster). Metal is a fantastic option for this recipe, but make sure you use a lighter colored pie plate that doesn't feel too light and flimsy. Darker colored / lighter weight pans have a tendency to burn the crust before the filling has a chance to cook.
- Ceramic: Ceramic pie plates are beautiful, but they will take the longest to cook the crust and are more prone to yielding a softer bottom crust if you're not careful. You should also expect a filling that's kind of on the cakier side of things (because it takes longer to heat through, so a gooey filling will almost always mean an underbaked bottom crust when using a ceramic pan).
- Glass: A clear glass pie plate is a really great option for pie making because it allows you to actually peak at the bottom crust to see when it's browned. It takes a lot of the guesswork out! The cook time will take slightly longer than a metal pan and slightly less time than a ceramic pan. Just do be careful when using glass not to let the crust sit in the freezer for too long or you run the risk of having the glass shatter when it goes into the oven.

how to serve cookie pie
This chocolate chip cookie pie is best served warm and fresh from the oven (but not hot!) I find that about 1 hour of sitting on the counter makes it the perfect temperature for serving, but you can go slightly warmer or cooler if you prefer. I recommend serving this pie fresh on the day it's made (because as it sits, the crust will soften and the filling will dry out).
Cookie pie tastes delicious on its own or with a light sprinkling of sea salt flakes and/or a generous scoop of ice cream! You can also drizzle some caramel sauce, melted chocolate, or Nutella on top or add a dollop of whipped cream.
how to reheat day old pie
Although fresh is best when it comes to pies, most pies can be reheated to help crisp up the crust and bring it back to life after it's been sitting around for a while. To reheat this pie, pop any leftovers into the center of a preheated 350F oven and warm for 8 to 12 minutes or until warmed through.

tips for making flaky homemade pie crust
- Baking powder: A dash of baking powder in the pie dough helps the crust dry and crisp as it bakes and prevents shrinkage (because it will encourage the crust to puff and bake out instead of shrink and bake in).
- Larger butter chunks: When cutting the butter into the flour, leaving the butter pieces slightly larger will make for a flakier and crispier crust! Try to get the pieces to slightly larger than a pea (a few pieces that are larger or smaller are fine!)
- Cold, cold, cold ingredients: When it comes to the butter and water, it's important to ensure everything is super cold to ensure the crust comes out tender and flaky. It's also important to work relatively quickly so the butter doesn't soften as you work on the dough.
- Butter the pie dish: Buttering the bottom and sides of your baking pan will help encourage browning and crisping.
- Partially bake on the bottom oven rack: One of my favorite tricks for a perfect bottom crust! We're going to bake the pie for a few minutes in the center oven rack to allow the filling to bake through but we're also baking the pie for a bit on the very bottom oven rack to help the crust brown and crisp.
- Try to serve fresh: Pie crust will lose its crispiness and flakiness the longer it sits, which is why virtually all pie recipes will recommend serving any sort of pie fresh!
tips for making the cookie filling
- Dark brown sugar: There isn't a lot of brown sugar in this recipe, so I recommend using dark brown to make sure you get a good amount of molasses flavor and for some extra moisture and chew factor!
- Measuring flour: This cookie filling is designed to be a bit looser than a cookie dough but a bit thicker than a standard cake batter. To ensure it doesn't come out too dry or wet, it's important to measure the flour either by weight (for the most accurate measurements) or if using cups, by spooning the flour into your measuring cup and leveling off any excess with a knife. Never scoop the flour directly out of the bag with your measuring cup or it may pack in extra weight and make the filling dense.
- Mixing: Once the flour is added into the wet ingredients for the filling, take care not to overmix or (again) it can make the filling dense! Just mix until you have a streak free batter.
- Baking: You can customize the texture of the filling based on how long you bake the pie. Slightly underbake for a gooier filling or slightly overbake if you prefer a cakier cookie texture.
- Cooling: If you underbaked the pie, I'd recommend letting it cool for a bit longer to really make sure the filling is nice and set before slicing (otherwise it can get quite messy!) A slightly overbaked pie is best served earlier on to make sure it doesn't dry out.
check out these other recipes!
• Pecan Pie Cupcakes
• Apple Pie Cookies
• Apple Hand Pies
• Mini Pie Crust Cinnamon Rolls
Lastly, if you made this or any of my recipes, be sure to leave a comment and review below! I love hearing your thoughts! Also tag me on Instagram @eatsdelightfulblog so I can see what you're making.
Print
Chocolate Chip Cookie Pie
- Total Time: 2 hours 30 minutes
- Yield: 1 pie
Description
Combining 2 mouthwatering desserts! This chocolate chip cookie pie features a buttery and flaky pie crust with a gooey and rich chocolate chip cookie inspired filling. It's so deliciously warm and decadent and makes the perfect addition to any regular dessert table or your Christmas and Thanksgiving tables!
Ingredients
For the homemade pie crust (can sub for store-bought dough):
- 1 & ¼ cups (150g) all-purpose flour, spooned and leveled
- ¼ teaspoon baking powder
- 1 tablespoon granulated sugar
- ½ teaspoon salt
- ½ cup (115g) unsalted butter, cold and cubed
- 3 to 5 tablespoons ice cold water
For the cookie filling:
- 2 large eggs, at room temperature
- ½ cup (100g) dark brown sugar, packed
- ¼ cup (50g) granulated sugar
- ½ cup (115g) unsalted butter, melted and cooled
- 1 teaspoon pure vanilla extract
- ¾ cup (90g) all-purpose flour, spooned and leveled
- 1 cup (170g) semi-sweet chocolate chips or chunks, plus more for topping
- 1 large egg + 1 tablespoon milk (for the egg wash)
Instructions
Make the homemade pie crust:
- In a large bowl, combine flour, baking powder, sugar, salt, and butter. Cut the butter into the dry ingredients using a fork or your fingers until the butter pieces are slightly larger than a pea. Try to work relatively quickly because cold butter will yield to a flakier pie crust!
- 1 & ¼ cups (150g) all-purpose flour, ¼ teaspoon baking powder, 1 tablespoon granulated sugar, ½ teaspoon salt, ½ cup (115g) cold unsalted butter
- Mix in 3 tablespoons of cold water. The dough should start coming together into a ball. If it's too dry, keep mixing in cold water, 1 tablespoon at a time, until it starts to ball up into a dough. The dough may appear crumbly, but if you pinch it with your fingers, it should stick together.
- 3 to 5 tablespoons ice cold water
- Shape the dough into a rough disk and wrap with plastic wrap. Refrigerate for about 1 hour or until firmed up.
- Butter the bottom and sides of a 9 inch pie pan and set aside. *Note: your pie will finish baking faster in a metal pie pan, slower in a glass pan, and slowest in a ceramic pan. Metal pans are best for ensuring the bottom crust is extra crispy and if you like a gooier filling.
- Take the chilled dough out of the fridge and place onto a lightly floured work surface. Roll the dough out until it's about 2 to 3 inches larger than your pie pan and around ¼ inch thick. Try to make it as even of a circle as you can, but it doesn't have to be perfect.
- Quickly lift the rolled out dough up and into the pie plate, lightly pressing it to mold it into the bottom and up the sides of the pie dish. Use a sharp knife to cut off any excess dough that's hanging over the edges of the dish (or simply tuck it under itself for a more rustic look!) Crump the edges however you like (I just used a fork).
- Transfer the crust into the freezer for 10 to 15 minutes while you prep the filling.
Make the cookie filling:
- Position 2 oven racks: one in the center and one on the bottom shelves of your oven. Preheat your oven to 325F.
- In a large bowl, combine eggs, brown sugar, granulated sugar, butter, and vanilla. Whisk until smooth.
- 2 large eggs, ½ cup (100g) dark brown sugar, ¼ cup (50g) granulated sugar, ½ cup (115g) melted unsalted butter, 1 teaspoon pure vanilla extract
- Add flour and chocolate chips and fold together until you no longer see dry streaks of flour. The batter will be wetter than a typical cookie dough.
- ¾ cup (90g) all-purpose flour, 1 cup (170g) semi-sweet chocolate chips or chunks
- Take the pie crust out of the freezer and pour the filling in. Smoothen into an even layer.
- In a medium bowl, whisk together the egg and milk for the egg wash to combine. Brush the egg wash on the exposed edges of the pie crust.
- 1 large egg + 1 tablespoon milk
- Transfer the cookie pie to the center of your preheated oven and bake for 30 minutes. After 30 minutes in the center of the oven, carefully move the pie to the bottom oven rack and continue baking for another 20 to 35 minutes or until the center is puffed and the edges of the pie are golden brown.
- Cool the pie for about 1 hour on your counter before slicing and serving.

- Prep Time: 30 minutes
- Bake Time: 1 hour
- Category: Pies
Enjoy!


Add a Comment