
Churros meet cheesecake! Using my favorite NY style cheesecake as the base, this rich cheesecake filling is smooth and creamy and sitting on top of a crisp cinnamon graham cracker crust. The cake is then topped with butter and cinnamon sugar for that classic churro sparkle, crunch, and flavor. It's such a simple and fun twist on a classic recipe!

what is churro cheesecake?
Churro-ifying cheesecake leaves a lot up to the imagination and interpretation. So there's really no right or wrong answer for what exactly counts as a churros cheesecake. Either way, I'd say for this to be a true combination of two iconic desserts, you'd at least need the basics: cream cheese, cinnamon, and sugar.
When you Google "churros cheesecake" a lot of recipes use crescent roll dough as the crust - but I wanted to go a different route for my recipe. Partially because I didn't have any crescent roll dough, but mainly because I'm in LOVE with graham cracker crusts and I was NOT going to give that up. So this is my personal interpretation using a NY style cheesecake as the base which is then finished with a churros inspired topping.

what makes this cheesecake so good?
This recipe is truly the best of both worlds. It starts with a traditional graham cracker crust with cinnamon mixed in for some warm, churros style flavor. The filling is a classic dense vanilla cheesecake that's then brushed with melted butter followed by a GENEROUS sprinkling of cinnamon sugar on top.
The result is a crisp and toasty bottom crust, creamy and rich center, and some more crunch, sparkle, and flavor with the top coating!


how to make churros cheesecake
This cheesecake is made up of 3 main parts: the graham cracker crust, creamy cheese filling, and sparkly cinnamon sugar top. As always, you can find the full recipe details and ingredient amounts in the recipe card below, but here's a quick look at how this churro cheesecake is made:
- Graham cracker crust: To make the crust, graham cracker crumbs, sugar, cinnamon, and butter are all tossed together until well combined. The crust is then packed into the springform pan and partially baked on its own. The crust won't look super different (maybe a slightly warmer color but that's about it). This just helps set the surface to ensure the crust doesn't soak up the filling and get soggy!
- Cream cheese filling: The filling starts with creaming together cheese and sugar until smooth. All the remaining ingredients (except for the eggs) are then mixed in. Lastly, to finish the filling, the eggs are mixed in, one at a time, until everything is combined. The main key when making the filling is to watch out for overmixing! Otherwise, it's a very easy and straightforward process.
- Baking & cooling: Once the filling is ready, it's poured over the crust and then baked until puffed and lightly browned. Cooling the cheesecake is then a 3 step process: partially cool in the oven with the door ajar, cool to room temperature on the counter, then chill in the fridge to fully set it. The cooling process is also part of the magic behind its incredible texture - so don't skip any of the steps!
- Churro topping: At this point, we have a really incredible NY style cheesecake. To turn it into a CHURROS cheesecake, the chilled cake is topped with melted butter and a sparkly cinnamon sugar topping to really seal the deal. The main thing to keep in mind is to work relatively quickly to sprinkle over the sugar after brushing the top with the butter. The cold cheesecake will start to set the melted butter almost immediately and you want to get the sugar on top so it can stick before that happens.


a cheater's version of a water bath
Because cheesecake filling is a custard, it needs to be baked in a gentle and moist environment to ensure the filling sets to a creamy, crack-free consistency. To achieve this, cheesecake is typically placed in a large roasting dish and the dish is filled with water to come halfway up the sides of the cheesecake pan. This is what a traditional cheesecake water bath looks like - but there's a simpler way to go about doing this!
There are three main problems with the traditional method. The first is finding a pan large enough to fit your cheesecake - and that can be a challenge in and of itself! Second is there's a chance that the water bath will leak into your cheesecake - so the bottom of the pan needs to be wrapped with aluminum foil first. And finally, have you ever tried transferring the baked cheesecake out of the water bath?? It's a nightmare.
The cheat version (which is what I always use) is to simply place a large roasting dish on the bottom rack of your oven (directly underneath the cheesecake) and fill that with water. Then place the cheesecake on the rack directly above it. This creates a perfectly moist environment, but the cheesecake never has to touch the water!


why does cheesecake crack?
I personally LOVE this base cheesecake recipe because it has never, and I mean never, cracked on me. But when cheesecake does crack, it's usually due to a few common reasons: because of a sudden shift in temperature, overmixing, overbaking, or the sides sticking to the pan.
tips to get a crack-free cheesecake top
These are a few simple but valuable tips for getting a perfectly smooth top on your cheesecake:
1. room temperature, room temperature, room temperature!!
I hate those 2 words more than anyone, but room temperature ingredients are vital for a perfect cheesecake. Not only are they easier to mix together into a smooth batter, but room temperature ingredients bake up more gradually in the oven. Cold ingredients will get "shocked" when they hit the heat of the oven and this can cause the cheesecake to expand and shrink unpredictably - and ultimately crack.
2. don't overmix the cheesecake filling!
Because a) it's more work and who likes that? and b) it incorporates air into the batter (which is a big no no for something that's supposed to be dense). Air in the batter will rise up while the cheesecake is baking and pop which then causes cracks and deformations to form on the surface of the cheesecake.
3. cooling the cheesecake
How you cool down the cheesecake goes hand in hand with keeping the top smooth! The cheesecake could look perfect once it's done baking, but it can still crack if it's cooled down too quickly.
The best way to cool cheesecake is in the oven with the door just slightly ajar then on the counter top until it reaches room temperature before refrigerating. That prevents any shock of cold air from cracking the hot cheesecake after it's bake.
4. run a pairing knife around the edges
About 30 minutes after cooling in the oven, I carefully run a thin knife around the edges of the cheesecake to make sure it isn't stuck to the sides of the pan. The cheesecake will shrink as it cools, and if it's clinging onto the sides, it can rip and tear as it shrinks.

is it bad if cheesecake cracks?
After all those tips and explanations I just went over, you'd think "yes" right? Wrong.
Do cracks in cheesecake affect taste? If your cheesecake cracked due to a sudden shift in temperature, overmixed batter, or because the sides got stuck, then cracks will NOT affect the taste at all! The flavor, deliciousness, and overall enjoyability of eating a honking piece of cheesecake is the exact same.
The ONLY thing that cracking does in those situations is create a less than perfect look. And a few tiny cracks can easily be covered with the cinnamon sugar topping.
But do keep in mind that if your cheesecake cracked because it was overbaked, then the texture of your cheesecake will be drier, crumblier, and less creamy.
how do you know cheesecake is done baking?
Gently shake your cheesecake pan. The center should jiggle slightly but the outer edges should not. The edges will also be ever so slightly golden brown, but overall, the cheesecake should be a pale yellowish color. The surface will look slightly puffed but will sink slightly once it cools.
storage
Keep cheesecake covered and stored in the fridge. Avoid topping the cheesecake with the cinnamon sugar until right before you plan on serving it. The sugar topping will keep relatively well but it will dissolve and lose its sparkle the longer it sits.
The cheesecake will keep for up to 4 days.
check out these other cheesecake recipes!
• Coffee Cake Cheesecake
• Pumpkin Cheesecake
• Caramel Cheesecake
• Cinnamon Roll Cheesecake
• Apple Crumble Cheesecake
• No Bake Biscoff Cheesecake
• Oreo Cheesecake
Lastly, if you made this or any of my recipes, be sure to leave a comment and review below! I love hearing your thoughts! Also tag me on Instagram @eatsdelightfulblog so I can see what you're making.
Print
Churros Cheesecake Recipe
- Total Time: 5 hours 33 minutes
- Yield: 1 (9") cake
Description
Churros meet cheesecake! Using my favorite NY style cheesecake as the base, this rich cheesecake filling is smooth and creamy and sitting on top of a crisp cinnamon graham cracker crust. The cake is then topped with butter and cinnamon sugar for that classic churro sparkle, crunch, and flavor. It's such a simple and fun twist on a classic recipe!
Ingredients
For the graham cracker crust:
- 2 cups (240g) graham cracker crumbs
- ¼ cup (50g) granulated sugar
- 1 teaspoon ground cinnamon
- ½ cup (115g) unsalted butter, melted and cooled slightly
For the cheesecake filling:
- 4 (8 oz) full fat blocks cream cheese (32 oz total) at room temperature
- 1 cup (200g) granulated sugar
- ½ cup (120g) sour cream, at room temperature
- ¼ cup (32g) all-purpose flour
- ½ teaspoon salt
- 2 teaspoons pure vanilla extract
- 4 large eggs, at room temperature
For the cinnamon sugar coating:
- ⅓ cup (66g) granulated sugar
- 2 teaspoons ground cinnamon
- 3 tablespoons unsalted butter, melted and cooled slightly
Instructions
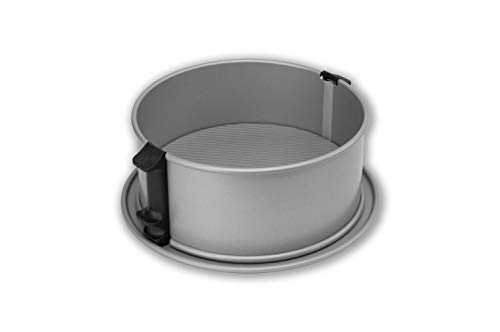
- Position one oven rack in the center position of your oven and a second rack on the bottom position. Preheat your oven to 325°F. Line the bottom of a 9" springform pan with parchment paper and set aside.
- Make the graham cracker crust: In a medium bowl, combine graham cracker crumbs, sugar, cinnamon, and butter. Mix together until all of the graham cracker crumbs are moistened with the butter.
- Pour the crust mixture into your 9 inch springform pan. Using the bottom of a cup, or any flat surface, pack the crumbs into the bottom of the pan and about halfway up the sides.
- Bake the crust in the center of your preheated 325°F oven for 8 minutes. The crust won't look significantly different. This is just to help set it and keep it crisp! Take the pan out of the oven and set aside to cool slightly while you work on the cheesecake filling. Keep the oven preheated to 325°F.
- Make the cheesecake filling: For all the following steps, make sure to watch out for overmixing. If using an electric mixer, keep it on LOW speed to ensure you don't incorporate too much air into the batter.
- Bring a medium sized pot of water to a boil while you work on the filling.
- In a large bowl, combine your blocks of cream cheese and sugar. Using an electric mixer fitted with the paddle attachment, beat together on low until smooth and lump free (about 1 to 2 minutes). You can do this by hand as well with a wooden spoon but it'll take some elbow grease.
- Add your sour cream, flour, salt, and vanilla extract to the cream cheese mixture. Mix together until combined.
- Add the eggs in one at a time, mixing after each addition to incorporate the egg into the batter before adding the next egg. After 2 eggs have been mixed in, stop to scrape down the bottom and sides of the bowl before adding the last 2 eggs. Scrape down the bowl again to make sure everything is evenly combined. Be careful not to overmix!
- Pour your cheesecake filling over your slightly cooled crust. It's fine if the crust is still warm. Grab a large baking dish (around 9x13") and place it onto the bottom rack of your oven. Carefully pour the boiling water into the large baking dish until it's about 2 inches high. Place the cheesecake onto the middle rack in your oven right above the water filled pan and shut the oven door. (See above post for visual).
- Bake the cheesecake in the center of your preheated 325°F oven for 60 to 75 minutes or until the surface is slightly puffed and the edges are very lightly browned. If you gently shake the pan, the very center of the cheesecake should jiggle but the edges should not.
- Turn the oven off and crack open the door. Leave the cheesecake in the oven to cool for 1 hour with the door slightly ajar. Halfway through (after about 30 minutes), carefully run a knife around the edges of the cheesecake to loosen it from the pan (to prevent sticking and cracking). After the hour, take the cheesecake out of the oven and cool completely to room temperature. Finally, cover the cheesecake and chill in the fridge for at least 4 hours or preferably overnight to set.
- Make the cinnamon sugar coating: In a medium bowl, whisk together cinnamon and sugar to combine. Take the cheesecake out of the fridge and remove the sides of your pan. Place the cheesecake onto your serving plate.
- Brush the melted butter over your cooled cheesecake. Try to work a bit quickly so the butter doesn't harden and set on the cold cheesecake. Sprinkle the cinnamon sugar evenly over the melted butter layer. Slice and serve!
- Prep Time: 25 minutes
- Bake Time: 1 hour 8 minutes
- Category: Cakes, Cheesecakes, Dessert
Enjoy!


Heather L. says
This recipe is absolutely outstanding! The cheesecake is dense and has the best taste you can imagine. This is a new family favorite!
Rhianna Johnson says
This turned out so amazing! Recipe was spot on. This is going into my favorites.
Linda says
I would like to make this in bar form. Can I bake this in a 9 x 13 baking dish?
Valerie says
This recipe looks delicious. I am making it now. Can you put the cinnamon & sugar mixture on it and leave it in the fridge until serving?
Jas says
Making this today! Does the cheesecake have to cool in the oven for the remaining 4 hours, after running a knife along the edges? Or can I cool it on the counter?