
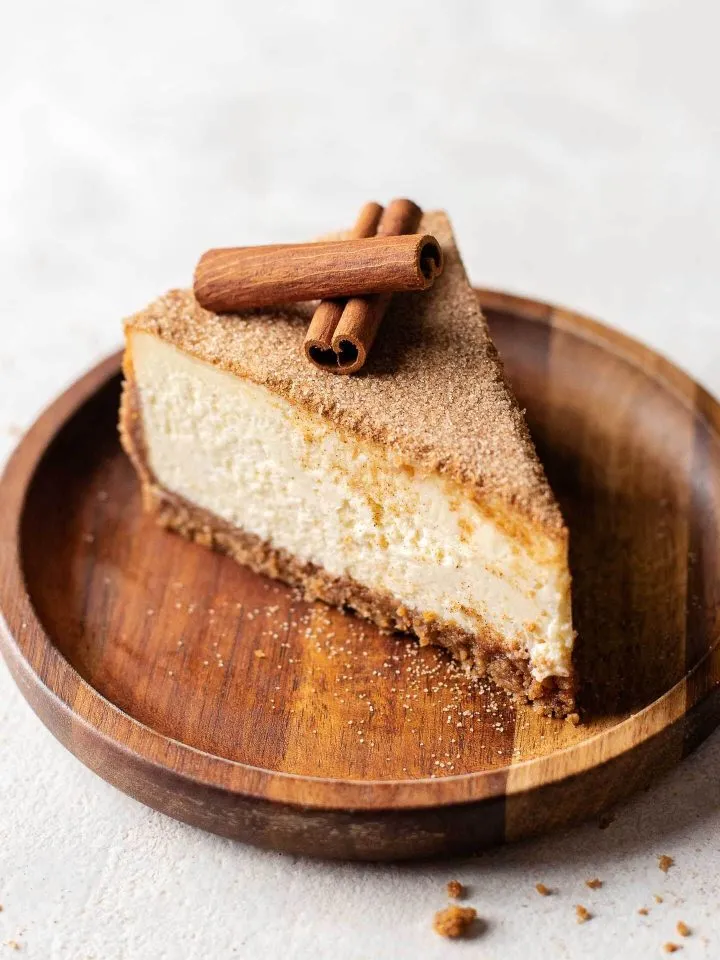
Sweet cinnamon rolls meet creamy cheesecake in this cinnamon roll cheesecake recipe! Using my favorite base cheesecake batter as the starting point, you have 2 layers of plain and cinnamon cheesecake swirled together and baked into decadent perfection. A topping of cream cheese icing and mini cinnamon rolls brings the whole dessert together!

what makes this cinnamon roll cheesecake SO good?
It's almost impossible for me to open Instagram and NOT see a cinnamon roll cheesecake recipe pop up. And while I love the cinnamon cheesecake love train, it never fails to make my stomach grouchy because I don't have an endless supply of slices. So I'm happily eating away at a slice as I type this post and I'm so so excited to share this recipe!
I've seen a few different ways to make cinnamon roll cheesecake, but my favorite by far has been the method of adding cinnamon to half the batter to create 2 swirled layers of traditional and cinnamon flavored cheesecake. I decided to go that route because it seemed easier than making a separate cinnamon sugar mixture - and I'm just obsessed with how the 2 distinct layers look!
I'm using my favorite tried and true base cheesecake batter with a HEAPING scoop of cinnamon for this recipe. We're also adding brown sugar to the cheesecake batter for some extra warm flavor and for a cozier color. The 2 fillings sit on top of a perfectly crispy graham cracker crust that also has a hint of cinnamon mixed in.
Since the cheesecake batter is on the simpler side of things, it also means you can go all out with the toppings! I topped my cheesecake with some cream cheese frosting inspired by the icing you'd find on cinnamon rolls. It adds some more cheesy flavor and also some sweetness. And of course, the final touch is some cute little pie crust cinnamon rolls on top!


how to make cinnamon roll cheesecake
The best cheesecakes have a crispy graham cracker crust with silky and creamy filling. It's not difficult to whip up a homemade cheesecake but there are a few keys to ensure you have a cheesecake that looks and tastes perfect. Here are a my top tips for making the best cheesecake:
- Cream cheese: Make sure to use full fat cream cheese that's sold in blocks. Low fat and cream cheese spreads are typically watered down and have a softer texture which can cause issues with the consistency of the filling.
- Ingredients: Allow all the cheesecake ingredients to come up to room temperature before starting. Not only will they incorporate more easily and more smoothly, but it'll also reduce the chance of the cheesecake cracking.
- Mixing: Overmixing cheesecake batter will incorporate air and (as it bakes) those air bubbles will float to the top of the cheesecake, pop, and create cracks. The cheesecake will still taste incredible, but it's unnecessary added work and will impact the final look! If you're using an electric mixer to make the batter, make sure you're always working on LOW speed and stop mixing as soon as the ingredients look combined.
- Baking the cheesecake: I go into a bit more detail about this below, but a water bath is really the key to a creamy and perfect cheesecake! Also keep a close eye on the cheesecake when the bake time comes close to ending to ensure it doesn't overbake.
- Cooling: Cheesecake needs to cool in 3 stages: for a bit in the oven with the door slightly ajar, on the counter to bring it up to room temperature, and THEN in the fridge until fully firmed up! This cooling process helps the filling continue to cook and set and will prevent cracking due to sudden temperature shifts.
- 30 minutes after cooling: After cooling the cheesecake in the oven for about 30 minutes, run a thin knife around the edges of the cheesecake to loosen any parts that may be stuck to the pan. Cheesecake shrinks as it cools, and if any parts are stuck to the sides of your pan, it can cause tears and cracks.
- Storage: Cover your cheesecake and keep it in the fridge until you're ready to serve. It will soften if it sits at room temperature so it's best served cold. Cheesecake will keep for around 4 days in the fridge.


easiest cheesecake water bath
Cheesecake needs a steamy environment to bake gradually so it can achieve its signature silky and creamy texture and crack-free top!
A traditional water bath involves placing the cheesecake into a larger roasting pan and filling that large pan with boiling water until it reaches about halfway up the sides of the cheesecake. This does a good enough job but there are 3 main issues with this method. 1) You need a pan big enough to fit the cheesecake, 2) it requires some extra care to ensure the water bath doesn't leak into the cheesecake, and 3) it can be a pain trying to get the cheesecake out of the pan later on down the line.
But there's another (easier) way to achieve that steamy environment! You can simply place a large pan on the bottom rack of your oven and fill that with boiling water. Then place the cheesecake on another rack directly above the water filled pan. You'll still have that steam needed to gently cook the cheesecake without all the headache of a traditional water bath.

how to tell when cheesecake is fully baked
You can't use a traditional skewer test to check the doneness of cheesecake because it's going to come out with batter no matter what. To tell when the cheesecake is done baking: the surface should be slightly puffed, the edges should be lightly browned, and if you jiggle the pan, the center of the cheesecake should wiggle like jello but the edges should appear set.
Cheesecake filling is like a custard, so it will seem underdone when it first finishes baking but it'll continue to set as it cools. Once the cheesecake is fully chilled, it should be very firm, dense, and creamy.
check out these other recipes!
• Cinnamon Roll Gooey Butter Cake
• No Knead Croissant Cinnamon Rolls
• Cinnamon Roll Cookies
• Coffee Cake Cheesecake
• Churros Cheesecake
Lastly, if you made this or any of my recipes, be sure to leave a comment and review below! I love hearing your thoughts! Also tag me on Instagram @eatsdelightfulblog so I can see what you're making.
Print
Cinnamon Roll Cheesecake
- Total Time: 1 hour 45 minutes + 7 hour chill time
- Yield: 1 (9") cheesecake
Description
Sweet cinnamon rolls meet creamy cheesecake in this cinnamon roll cheesecake recipe! Using my favorite base cheesecake batter as the starting point, you have 2 layers of plain and cinnamon cheesecake swirled together and baked into decadent perfection. A topping of cream cheese icing and mini cinnamon rolls brings the whole dessert together!
Ingredients
For the crust:
- 2 cups (250g) graham cracker crumbs
- ¼ cup (50g) granulated sugar
- 1 teaspoon ground cinnamon
- ½ cup (115g) unsalted butter, melted and cooled
For the cheesecake filling:
- 4 (8 oz) full fat blocks cream cheese, room temperature
- 1 cup (200g) packed brown sugar, light or dark
- ½ cup (120g) full fat sour cream, room temperature
- ¼ cup (32g) all-purpose flour, spooned and leveled
- ¼ teaspoon salt
- 2 teaspoons pure vanilla extract
- 4 large eggs, room temperature
- 2 tablespoons ground cinnamon
For the cream cheese frosting (optional):
- 3 oz full fat block cream cheese, room temperature
- 3 tablespoons (45g) unsalted butter, room temperature
- 1 ½ cups (195g) powdered sugar, sifted
- ½ teaspoon pure vanilla extract
- mini pie crust cinnamon rolls (optional - for decorating)
Instructions
Graham Cracker Crust:
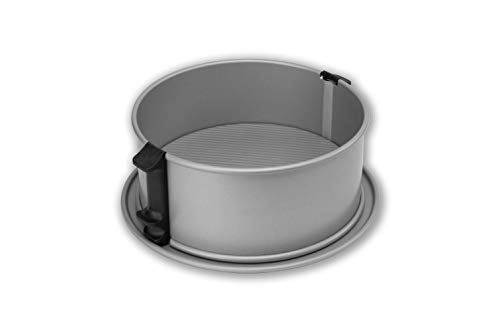
- Position 2 racks in your oven - one rack on the bottom shelf and one rack in the center. Preheat your oven to 325°F. Line the bottom of a 9" springform pan with parchment paper and set aside.
- In a medium bowl, mix together graham cracker crumbs, sugar, and cinnamon.
- Add the butter and mix until moistened.
- Drop the crust into your springform pan and pack it into the bottom and about halfway up the sides. It's easiest to do this with the bottom of a cup or ramekin.
- Bake the crust in the center of your preheated oven for 8 minutes. The color and appearance of the crust won't change.
- Set aside the crust to cool slightly while you make the filling.
Cheesecake Filling:
- If you're making the cheesecake with an electric mixer, make sure to do all the steps on LOW speed and avoid overmixing or it may cause the cheesecake to crack.
- In a large bowl, combine cream cheese and sugar. Using an electric mixer fitted with the paddle attachment or a wooden spoon by hand, cream together until lump free.
- Mix in the sour cream, flour, salt, and vanilla.
- Add the eggs in, one at a time, mixing after each addition to combine. Stop mixing as soon as the egg disappears. Use a rubber spatula to scrape down the bottom and sides of the bowl after the second egg is added in to ensure everything is getting properly combined.
- Once all the eggs are mixed in, scrape down the sides and bottom of the bowl again and give the batter a light mix by hand if needed to incorporate everything.
- Pour about half of the cheesecake batter over your slightly cooled crust (it's OK if it's still a little warm) and spread into an even layer.
- To the remaining half of the cheesecake batter in the bowl, gently fold in the ground cinnamon. Again, take care not to overmix!
- Pour the cinnamon flavored cheesecake batter over the plain batter in your springform pan. Use a knife or skewer to lightly swirl the 2 batters, taking care not to disturb the graham cracker crust.
- Place a large baking pan into the bottom rack of your oven. Fill the pan with at least 2 inches of boiling water to create a steamy environment. Place the cheesecake on the center rack of your oven directly above the water filled pan then shut the door.
- Bake the cheesecake in the center of your preheated 325°F oven for 65-70 minutes or until evenly puffed and slightly golden brown along the edges. If you gently shake the pan, the center of the cheesecake should jiggle like jello but the outer edges should appear firm.
- Once the cheesecake is done baking, turn the oven off and crack the door open. Cool the cheesecake in your oven with the door slightly ajar for 1 hour. After about 30 minutes of cooling, carefully run a thin knife around the sides to loosen any stuck edges - this helps prevent cracking when the cheesecake cools and shrinks.
- After the 1 hour, take the cheesecake out of the oven and set aside to cool to room temperature. Once cooled, cover and chill the cheesecake in the fridge for at least 6 hours or overnight.
Cream Cheese Frosting (Optional):
- In a large bowl, combine cream cheese and butter. Mix together with a wooden spoon until smooth and combined.
- Add powdered sugar and mix until smooth and creamy. Lastly, mix in the vanilla.
- Take the chilled cheesecake out of the fridge and unlatch the sides of the springform pan. Transfer the cheesecake onto your serving platter then spread the frosting on top. Decorate with mini cinnamon rolls if desired then slice and serve!
- Prep Time: 40 minutes
- Cook Time: 1 hour 5 minutes
- Category: Cheesecakes
Enjoy!


Gayle says
Hi there,
Can this recipe be made as mini cheesecakes? If so, could you please advise me on how to do so? Thank you so much and I hope you are having a great weekend!
Gayle
Eva says
Soooo delicious and easy. Great tips on the water bath and running a knife around the sides after 30 minutes of cooling in the oven. Came out perfect with not a crack. Thank you for sharing this recipe.
Rose STANHOPE says
Delicious the family loved it