
All the best qualities in a red velvet cake, cookie, and brownie... combined! These Frosted red velvet bars are so deliciously fudgy and chewy, with just the right amount of tanginess, and a beautiful deep red color. They're topped with a velvety smooth cream cheese frosting and a sprinkling of red crumbs for a dreamy spin on a vintage cake.

are these cookie bars or brownie bars?
Ok... I spent WAY longer than you could imagine trying to decide on a name for these frosted bars. I seriously couldn't pick between calling them a brownie or a cookie. Eventually I finally settled on just calling them bars but honestly, I'm still a little iffy about the name!
But what I CAN tell you is that these bars are seriously all the best qualities that you could imagine in a brownie, a cookie, and red velvet cake... combined! They're SO unbelievably fudgy and dense like a brownie, soft and chewy like a cookie, and tender and soft like a cake!
The bars themselves have that slight acidic flavor that you'd expect out of a classic red velvet cake, and the cream cheese frosting on top adds even more tanginess and flavor. I don't think I can do them justice with just describing them - this is really a "you need to see it to believe it" kind of recipe ... or I guess, taste it to believe it. But trust me on this: these are ridiculously good!

how to make frosted red velvet bars
The process of making these bars is a lot like making a brownie. While this recipe is very forgiving in the event of a little mistake, here are a few tips you should keep in mind to ensure they come out absolutely perfect:
- Flour: This is an ingredient that can very easily be mismeasured if you're using cups, so I always recommend breaking out the kitchen scale if you have one! If you do want to measure the flour with cups, never scoop the measuring cup directly into the bag of flour! This will condense it and add more weight, which will ultimately dry out the bars. Instead, use a spoon to scoop the flour into your measuring cup then use a flat utensil to level off any excess.
- Cocoa powder: For the most vibrant red color, use unsweetened cocoa! It's more acidic than Dutch Processed and it's that acid that helps keep the color nice and bright.
- Sugars: A combination of sugars give these bars their moist, chewy, and fugdy quality while ensuring they're perfectly tender. So for best results, don't substitute one for the other!
- Butter: This goes against the traditional baking rule of using room temperature ingredients. But for this recipe, you actually want the butter to be piping HOT when it's added to the sugars. This will partially melt them giving you an extra dense and brownie like bar. Meanwhile, the sugars will simultaneously cool down the butter quickly (allowing you to move onto the next step without having to wait)!
- Eggs: To ensure the butter doesn't seize up, make sure the eggs are at room temperature before using. It will make the batter easier to work with and will ensure an even texture. You can quickly bring the eggs up to room temperature by submerging them in warm water (with the shell on) for about 5-10 minutes. It works like a charm!
- Food coloring: Not all food colorings will work well in baking! If you consistently get brownish red velvet desserts, the culprit could be your food coloring. Try to choose a good quality brand (it doesn't have to be expensive, but I just wouldn't go for the cheapest one on the shelf!) I personally love LorAnn Oils and Wilton brand food colorings. Also make sure to use GEL food coloring and NOT liquid! This is important! Liquid food coloring will water down the batter and isn't as concentrated (meaning you would need a lot more to get the same color).
- Mixing: At each stage in this recipe, make sure you don't overmix any of the ingredients. When the eggs are added in, overmixing can incorporate air and will make the bars less dense and fudgy. After adding in the flour, overmixing can overwork the gluten which will result in a dense (not in a good way) and dry bar.
baking & cooling
Testing the doneness of these bars is a lot like a brownie. A skewer inserted into the center shouldn't come out perfectly clean - otherwise it means the bars are overdone! The skewer also shouldn't have smooth wet batter on the tip or it means they need a bit longer in the oven. For a perfect bake, pull the bars out of the oven once a skewer comes out with moist, fudgy crumbs on the tip.
Afterwards, it's important to cool the bars completely to room temperature in the pan. This will make it easier to pull them out without any breaking. It will also ensure the cream cheese frosting doesn't melt when you put it on!


decorating red velvet bars
What's a red velvet dessert without some cream cheese frosting? And for that classic red velvet look, I also sprinkled some crumbs from the red velvet bars on top.
When it comes to the cream cheese frosting, whipping it up involves mixing the cheese and butter together to work out any lumps and then mixing in the remaining ingredients (which are just sugar and vanilla). It's not only delicious but it also pairs beautifully with the red velvet bottom.
There are just 3 things to keep in mind when working with cream cheese frosting:
- Room temperature ingredients: In order for the frosting to whip up smooth and velvety, make sure the cream cheese and butter are at room temperature before starting. This helps prevent those tiny little clumps you may get when making frosting.
- Powdered sugar: Another key to a smooth frosting: sift the powdered sugar before using! This is especially important if you store it for a prolonged period. As powdered sugar sits, it can pack together and form tough clumps. Sifting just makes sure those don't sneak into your frosting!
- Troubleshooting: Finally, cream cheese frosting is quite famous for being soft (especially when compared to a sturdier frosting like buttercream). Depending on how warm the butter and cream cheese were, how warm your home is, and how absorbent your brand of powdered sugar is, the frosting may or may not be perfect to use directly after making it. If you find it's too soft for you to work with it, pop it into the fridge for a few minutes to allow the butter and cheese to harden slightly before using. This will help firm up the entire frosting!
Other than that, there's not much else to say. You can decorate the bars however you like with the frosting. If you plan on just spreading it on top like I did, you can usually use the frosting right away even if it is a little soft. If you want to pipe anything on top or write a message with the frosting, then I would definitely chill it for a few minutes before using.
If you want to top the bars with crumbs like I did, before spreading the frosting on top, use a sharp knife to slice a tiny sliver off of one side from the red velvet bar (you can see what I mean in the photo above). Use your fingers to crumble it up into a separate plate and then you can use it to top the frosted bars.

FAQs
Can you leave out the vinegar?
No! The balance of acidity is what makes red velvet desserts so vibrant in color. Leaving out the vinegar could leave you with a browner bar. The vinegar also makes the bars more tender and slightly tangy to really channel the red velvet cake feeling.
Can you substitute the unsweetened cocoa powder?
Unsweetened cocoa is more acidic than Dutch-processed. Like I mentioned above, the balance of acidity helps brighten the red color of these bars. Swapping the unsweetened cocoa powder for another variety can impact that balance and can cause your bars to come out brown - so I would stick to unsweetened cocoa for the best results.
Can you leave out the food coloring?
Absolutely! Red velvet desserts were historically more on the browner side of things, but it's more of a modern concept to add food coloring. If you want to leave it out, feel free! Just expect the bars to be browner in color.
How do you store red velvet bars?
Since there's cream cheese in the frosting, these bars need to be kept in the fridge. Keep covered with plastic wrap and the bars will keep for about 4 days. The frosting and bars will harden slightly once they're chilled, so you can set them out at room temperature about 30 minutes before serving to allow everything to warm back up.
check out these other recipes!
• Tiramisu Brownies
• BEST Gooey Brownies
• Cheesecake Bars
• Apricot Jam Bars
• Chocolate Chip Cookie Bars
• Gooey Lemon Cookie Bars
Lastly, if you made this or any of my recipes, be sure to leave a comment and review below! I love hearing your thoughts! Also tag me on Instagram @eatsdelightfulblog so I can see what you're making.
Print
Frosted Red Velvet Bars
- Total Time: 1 hour 50 minutes
- Yield: 9 large bars
Description
All the best qualities in a red velvet cake, cookie, and brownie... combined! These Frosted red velvet bars are so deliciously fudgy and chewy, with just the right amount of tanginess, and a beautiful deep red color. They're topped with a velvety smooth cream cheese frosting and a sprinkling of red crumbs for a dreamy spin on a vintage cake.
Ingredients
Red Velvet Bars:
- 12 tablespoons (172g) unsalted butter
- ¾ cup (150g) granulated sugar
- ¾ cup (150g) dark brown sugar, packed
- 3 large eggs, room temperature
- 2 teaspoons pure vanilla extract
- 1 ½ teaspoons red gel food coloring
- 1 ½ teaspoons white vinegar
- 1 ¼ cups (163g) all-purpose flour, spooned and leveled
- ¼ cup (25g) unsweetened cocoa powder
- ½ teaspoon salt
Cream Cheese Frosting:
- 4 oz block full fat cream cheese, softened
- ¼ cup (60g) unsalted butter, softened
- 1 ½ cups (165g) powdered sugar, sifted
- ½ teaspoon pure vanilla extract
Instructions
Red Velvet Bars:
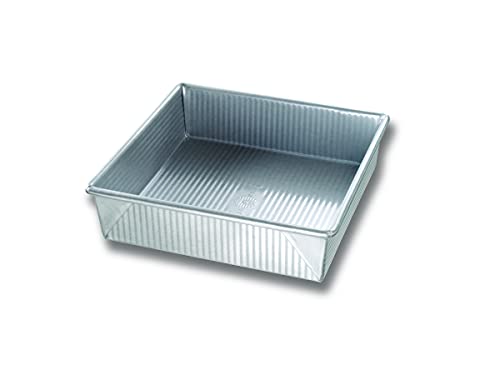
- Preheat your oven to 350F. Grease and line the bottom and sides of a 9x9" baking pan with parchment paper and set aside.
- In a medium pot, melt butter until liquid and it just starts to sizzle.
- Take the pot off the heat and immediately add in the granulated and brown sugar. Whisk together until the butter stops separating from the sugars and you have a thick, glossy mixture.
- Pour the butter sugar mix into a large bowl. It may be a little warm but it shouldn't be hot at this point. If it's hot, set it aside for 5-10 minutes just to cool slightly.
- Whisk in the eggs one at a time followed by the vanilla, food coloring, and vinegar.
- Lastly, add in the flour, cocoa powder, and salt and mix together until combined. Be careful not to overmix.
- Pour the batter into your prepared baking pan. Bake in the center of your preheated oven for 25-30 minutes or until a skewer inserted into the center comes out with a few fudgy crumbs.
- Cool the red velvet bars completely to room temperature in the pan before pulling them out and frosting.
Cream Cheese Frosting:
- In a large bowl, combine cream cheese and butter.
- Use an electric mixer fitted with the paddle attachment to cream together until smooth.
- Add in the powdered sugar and mix on low until the sugar is dissolved.
- Scrape down the bottom and sides of the bowl with a rubber spatula then add in the vanilla. Beat together until smooth and combined.
- You should be able to use the frosting right away, but if it's too soft, pop it into the fridge for 20-30 minutes to allow it to firm up slightly before using.
- Pull the cooled red velvet slab out of the baking pan and place onto your serving platter.
- (Optional) If you want some red velvet crumbs to crumble over the frosted bars, cut a small strip off of one side (see above post for visual) and use your fingers to crumble it up into a plate.
- Drop the frosting on top of the red velvet bars and spread it evenly over the surface. Sprinkle the reserved crumbs on top. Slice into 9-16 bars (depending on how large you want them) and serve!

- Prep Time: 25 minutes
- Bake Time: 25 minutes
- Category: Bars
Enjoy!


Add a Comment