
Gingerbread cookie bars are a classic Christmas cookie made SO much easier! These cookie bars feature all the delicious warm and cozy flavor of a traditional gingerbread cookie but ready in less than half the time and effort. They don't require any chilling, rolling, or cutting and will never overspread. The bars bake up perfectly dense and chewy with just the right amount of spice - plus, decorating is a breeze!

what makes these gingerbread cookie bars so good?
The Christmas festivities are in FULL swing and I could NEVER let the season pass by without a whole lot of gingerbread making. For my fellow lazy / impatient friends, this recipe goes out to you. Gingerbread cookie bars are the BEST thing to make when you want some warm and toasty deliciousness ASAP with very little work involved!
These bars completely cut out the chill time (which is by far the only negative thing about making gingerbread cookies if you ask me). They're much more fail-proof because you don't have to worry about overspreading. AND they have all the same delicious warm and toasty flavor and soft and chewy texture. They're also super easy to decorate - and if you have some spare time, you can make a few mini gingerbread men to use as decorations or just drop a few sprinkles on top.


how to make gingerbread cookie bars
If you want to make mini gingerbread men to decorate the top of the bars, I would start the cookie dough first before making the bars. I personally used my cutout gingerbread cookie recipe for them but you could use your own favorite recipe or use some store bought cookies. You can also skip the cookie decorations entirely if you prefer.
When it comes to the actual cookie dough for the bars, we start by creaming together butter and sugars. The remaining wet ingredients are whisked into that mixture and finally the dry ingredients get folded in to complete the dough. Seriously so easy!
The cookie dough comes out a bit softer than your average gingerbread. Since these are baked in a pan, there's no worrying about overspreading. Having a softer dough also makes it easier to spread the dough into an even layer in the pan.
After dropping the dough into the pan, it's baked until puffed and no longer shiny on the surface. After baking, it's important to let the cookie cool completely in the pan before trying to pull it out and frost the bars. It can be very difficult to transfer to cookie slab when it's warm and the icing will melt all over the place!
As for making the icing, all you need to do is whisk together powdered sugar and liquid (either water, milk, or heavy cream) and it's ready! It doesn't really matter which liquid you use, but each one will deliver a slightly different opaqueness - water will create the most translucent icing while heavy cream will be more opaque and milk will be somewhere in between. I personally used milk and feel like it does the job perfectly well!

how to decorate gingerbread cookie bars
Since gingerbread cookies are most traditionally paired with an icing, I decided to go with a simple powdered sugar icing for topping these cookie bars! It comes out kind of like royal icing but it's so much easier to make. I also had some mini gingerbread men leftover from another recipe I was working on, so I plopped them on top.
You can make your own homemade gingerbread cookies to decorate your bars if you're up for some added work or simply leave them plain or topped with some festive sprinkles!
If you do want to decorate the cookie with anything, first let the icing sit for about 5 to 10 minutes (just to form a very light crust on the surface) before placing any gingerbread cutouts or sprinkles on top. If you try to decorate the cookies while the icing is still fresh, most of the toppings will just sink to the bottom or slide right off! If you wait too long, then the icing will fully set and the toppings won't stick.
After decorating to your liking, set aside to allow the icing to fully dry and set before slicing. You could serve it right away, but it'll get kind of messy if the icing is still fresh!


more tips
- measuring flour: always always ALWAYS measure flour by weight or (if using cups) by spooning and leveling the flour. Scooping your measuring cup straight into the bag of flour can pack in extra weight and lead to dry cookies!
- room temperature: The cookie dough whips up much faster and smoother with room temperature ingredients. They also will give you a better, even textured cookie.
- mixing: This cookie dough doesn't need a whole lot of whipping or mixing. In fact, overmixing the dough after the flour is added can cause the cookies to end up dense. So do the bare minimum in terms of effort!
- baking: This is a bit obvious but take care not to overbake the bars or they'll end up dry! The cookie will be soft when it's hot but will firm up and set as it cools.
- cooling: Make sure you cool the cookie completely before pulling it out of the pan and decorating. The hot cookie will be too soft to transfer and icing a warm cookie will create a runny, sticky mess!

check out these other recipes!
• Chubby Gingerbread Man Cookies
• Giant Sugar Cookie Cake
• Chocolate Blossom Cookies
• Melting Snowman Cookies
• Iced Butter Pecan Cookie Bars
• Stacked Christmas Sprinkle Cookies
• Chai Spiced Snowflake Cookies
Lastly, if you made this or any of my recipes, be sure to leave a comment and review below! I love hearing your thoughts! Also tag me on Instagram @eatsdelightfulblog so I can see what you're making.
Print
Gingerbread Cookie Bars
- Total Time: 1 hour 5 minutes
- Yield: 9 bars
Description
Gingerbread cookie bars are a classic Christmas cookie made SO much easier! These cookie bars feature all the delicious warm and cozy flavor of a traditional gingerbread cookie but ready in less than half the time and effort. They don't require any chilling, rolling, or cutting and will never overspread. The bars bake up perfectly dense and chewy with just the right amount of spice - plus, decorating is a breeze!
Ingredients
For the Gingerbread Cookie Bars:
- 1 ½ cups (195g) all-purpose flour, spooned and leveled
- 1 teaspoon ground cinnamon
- 1 teaspoon ground ginger
- ½ teaspoon ground allspice
- ½ teaspoon ground cloves
- ½ teaspoon baking soda
- ¼ teaspoon salt
- ½ cup (115g) unsalted butter, softened
- ¼ cup (50g) packed brown sugar, light or dark
- ¼ cup (50g) granulated sugar
- 1 large egg, room temperature
- ¼ cup (60mL) unsulphered molasses
- 1 teaspoon pure vanilla extract
For the Icing:
- ¾ cup (95g) powdered sugar
- 1-2 tablespoons milk (water or heavy cream also work)
- festive sprinkles and gingerbread men (optional - for decorating)
Instructions
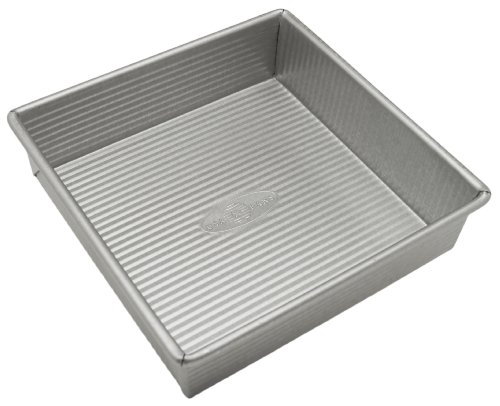
- Preheat your oven to 350°F. Grease an 8x8 inch pan and line the bottom and sides with parchment paper. Leave a bit of extra parchment paper hanging over the sides of the pan to make it easier to lift the cookie out later.
- In a medium bowl, whisk together flour, cinnamon, ginger, allspice, cloves, baking soda, and salt to combine. Set aside.
- In a large bowl, cream together butter, brown sugar, and granulated sugar until light and fluffy.
- Whisk in the egg followed by the molasses and vanilla to combine.
- Finally, mix in the dry ingredients until streak free. The cookie dough will be sticky.
- Drop the cookie dough into your prepared baking pan and spread into an even layer.
- Bake the cookie in the center of your preheated 350°F oven for 20 to 25 minutes or until puffed, no longer shiny on top and the edges are slightly browned. Take the baked cookie out of the oven and set aside to cool completely in the pan before decorating.
- Make the icing: In a medium bowl, whisk together powdered sugar and 1 tablespoon of milk. If needed, gradually whisk in more milk until you reach your desired icing consistency.
- Pull the cool cookie out of the pan using the parchment overhang and place on your serving platter.
- Pour the icing on top and spread to evenly cover the surface of the cookie.
- Let sit for 5 to 10 minutes or until a light crust forms on the surface of the icing before decorating with sprinkles and/or gingerbread cutout cookies. Decorating the cookies when the icing is fresh will cause the toppings to slip, slide and sink. But be careful not to wait too long or the icing will set and your decorations won't stick.
- After decorating, let the cookie sit until the icing is fully set for cleaner slices. You could slice it right away but it'll be messy!

- Prep Time: 15 minutes
- Bake Time: 20 minutes
- Category: Cookies
Enjoy!


Add a Comment