
No bake chocolate cheesecake is just as creamy and silky as a baked cheesecake, but a lot easier to make and ready in less time! It has layers of crispy Oreo cookie crust, dense yet airy chocolate cream cheese filling, and topped with a smooth chocolate ganache on top. It's rich, decadent, and the BEST chocolate cheesecake!

no bake vs classic chocolate cheesecake
No bake and classic chocolate cheesecake have a lot in common, but there are a few differences that make each one uniquely delicious!
- Ingredients: A lot of the ingredients in bake / no bake chocolate cheesecake are the same, but there are a few notable differences. While both of them feature cookies, butter, cream cheese, sour cream, cocoa / chocolate and vanilla, no bake cheesecake is made without eggs or flour / cornstarch. Heavy cream is usually used in their place to add volume.
- Texture: No bake cheesecakes generally have a softer filling consistency that can kind of be compared to a mousse. The filling is usually airier and feels a bit lighter than baked cheesecakes. The addition of melted chocolate in this filling helps it firm up a bit better and will give it a slightly denser texture that's more similar to baked cheesecake!
- Final product: No bake cheesecake is the perfect recipe to make if you're new to cheesecake making and are a little intimidated by it. There's a lot less that can go wrong and there are less considerations you have to be mindful of. You also get to shave off over an hour of bake time, so the cheesecake is ready that much quicker!

choosing the ingredients
This cheesecake doesn't have a whole lot of ingredients and they're mostly household staples. That being said, there are some things to keep in mind when shopping for the ingredients to ensure the cheesecake sets properly and looks the part!
- Oreo cookies: Make sure to use regular Oreo cookies (not double stuff, thin, or any other varieties). The original cookies have the perfect amount of filling to cookie ratio for this crust.
- Cream cheese: The best cream cheese to use for cheesecake is the type that's sold in bricks / blocks. It has less moisture than cream cheese spread and is noticeably firmer, making it ideal for achieving a perfectly dense filling.
- Chocolate: Use good quality chocolate for the filling and ganache to ensure everything comes out smooth and flavorful. Baker's / couverture chocolate is the best type to use. Don't feel the need to buy the priciest one on the shelf though - any off brand baking chocolate works (just make sure it's specifically intended for baking / melting).
- Sour cream: Use FULL FAT sour cream for the best texture and flavor. If you don't have any on hand, full fat Greek yogurt also works in its place!
- Heavy cream: Make sure you're using heavy whipping cream or the filling will not thicken and set properly.

how to make no bake chocolate cheesecake
Here's a quick little look at how this cheesecake is made with step by step photos, but as always, you can find the full detailed recipe further down in this post.
- Cookie Crust: Starting off with a super easy step: simply mix together cookie crumbs and melted butter to combine then pack the mixture into your springform pan. Set the crust aside in the fridge while you work on the filling.
- Cheesecake filling: The filling starts off by creaming together cream cheese, sugar, and cocoa until smooth. Add all the remaining ingredients (minus the heavy cream) then mix again to combine. Finally, very slowly stream the heavy cream into the bowl while mixing to finish off the filling.
- Chill time: Pour the prepared filling over the crust and use a spoon or spatula to even out the top. Chill the cheesecake until the filling is fully set.
- Finishing touches: Melt together chocolate and heavy cream to make the ganache then pour it over the chilled cheesecake. Chill the cheesecake again just to set the ganache before digging in!


no springform pan?
You have a few different options to make no bake cheesecake without a springform pan. Now, a springform pan does make it easier to get the cheesecake out - so if you have one, I really recommend using it! But that being said, here are some other pan options:
- Mini cheesecakes: You can make smaller serving sizes using a cupcake / muffin tin. Standard sized tins or jumbo sized tins work great! Simply line the pan with paper liners then layer individual cheesecakes in the cups. This recipe will make about 24 standard sized mini cheesecakes or 8-12 jumbo cupcakes.
- Regular 9" round cake pan: First off, keep in mind that the layered crust and filling will come up to about 2" in height - so make sure to pick out a pan with high enough sides (ideally 2.5" or taller). Next, cut 2 long strips of parchment paper. Make them long enough to run across the bottom of the pan and up and over the sides. Lay the 2 strips of parchment paper into the bottom and over the sides of your pan in an X - this will be your handle to pull the cheesecake out later! Try your best to use a thick, sturdy, good quality parchment paper so it doesn't rip on you - if you have a more flimsy roll of parchment, you may find it helpful to double the strips for added support.
- No pan: This involves layering the no bake cheesecake directly onto your serving plate / stand. You'll simply need to cut a long strip of cake collar or parchment paper then use it to create a 9" tube and tape the ends to seal. Place this tube onto your serving plate then layer the crust and filling in there. You won't be able to pack the crust up the sides, so just pack it into the bottom. For this, I really recommend using a strip of cake collar because it will give you the best support, but a double layer of parchment paper would also work in a pinch.

chocolate cheesecake FAQs
Can this be made gluten free?
Absolutely! Simply swap out the regular Oreos for gluten free cookies.
Can I use cream cheese spread?
A lovely reader recently pointed out that cream cheese blocks aren't available in some parts of the world, and usually, cream cheese spread is the only alternative. This recipe gets a good amount of thickening power from the melted chocolate, so it should be OK to use cream cheese spread for this recipe. That being said, your cheesecake will be slightly softer, but it should still slice pretty well and the flavor will be identical!
When is the best time to serve no bake cheesecake?
Keep no bake cheesecake in the fridge until right before you're ready to serve it. As it sits out at room temperature, it will soften and become difficult to slice cleanly.
How do I store chocolate cheesecake?
Chocolate cheesecake will keep for up to 4 days in the fridge. Cover it tightly with plastic wrap or keep it stored in an airtight container.

more tips
- Pack the crust in FIRMLY: To ensure the crust doesn't crumble on you when you try to slice the cheesecake, make sure to pack it firmly into your springform pan! I like to use the bottom of a cup for best results. If you're worried about the crust being too delicate, you can also lightly bake the crust in the center of a preheated 325F oven for 7 minutes to crisp it up further and make sure it holds together. If you do bake the crust, cool it completely before adding in the filling.
- Sift the powdered sugar and cocoa: One of the keys to a silky smooth filling! Powdered sugar and cocoa love to clump, so they should be sifted before using.
- Room temperature everything (except for the cream): Again, for a smooth filling, make sure to bring the cream cheese and sour cream up to room temperature before using. It's OK if the chocolate is a little warm, but it should also be more or less at room temperature - and NOT hot! The cream on the other hand should be nice and cold to ensure it whips up to stiff peaks.
- Mix the cream in SLOWLY: If you try to add the cream to the filling too quickly / all at once, the cold cream will shock the other room temperature ingredients. This will result in an uneven and clumpy filling.
Check out these other chocolate recipes!
BEST Chocolate Chip Cookies
Oreo Cheesecake
Chocolate Mousse Cake
No Bake Chocolate Biscuit Cake
Skillet Nutella Brownie
Lastly, if you made this or any of my recipes, be sure to leave a comment and review below! I love hearing your thoughts! Also tag me on Instagram @eatsdelightfulblog so I can see what you're making.
Print
No Bake Chocolate Cheesecake
- Total Time: 6 hours 20 minutes
- Yield: 1 (9") cake
Description
No bake chocolate cheesecake is just as creamy and silky as a baked cheesecake, but a lot easier to make and ready in less time! It has layers of crispy Oreo cookie crust, dense yet airy chocolate cream cheese filling, and topped with a smooth chocolate ganache on top. It's rich, decadent, and the BEST chocolate cheesecake!
Ingredients
For the cheesecake crust:
- 28 Oreo sandwich cookies, finely ground
- 6 tablespoons (90g) unsalted butter, melted and cooled
For the chocolate cheesecake filling:
- 3 (8oz) blocks full fat cream cheese, room temperature (24oz / 680g total)
- 1 ½ cups (195g) powdered sugar
- ⅓ cup (26g) unsweetened cocoa powder
- ¼ cup (60g) full fat sour cream or Greek yogurt, room temperature
- 1 teaspoon pure vanilla extract
- 8oz (225g) semi-sweet chocolate bar, melted and cooled slightly*
- 1 ¼ cups (300mL) cold heavy whipping cream
For the chocolate ganache:
- 6oz (170g) semi-sweet chocolate bar, chopped
- ¾ cup (180mL) heavy cream
Instructions
Make the crust:
- In a medium bowl, mix together Oreo cookie crumbs and butter until combined.
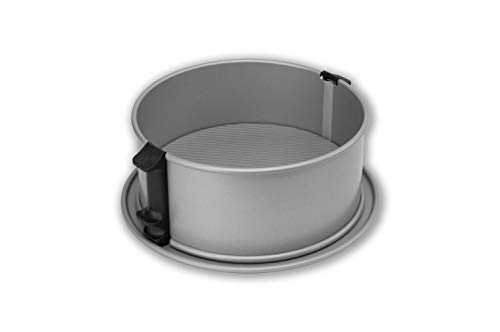
- Drop the Oreo mixture into the bottom of a 9" springform pan. Use the bottom of a cup to firmly pack the crust into the bottom and about 1 inch up the sides of the pan.
- Place the crust in the fridge while you prep the filling.
Make the chocolate cheesecake filling:
- In a large bowl, add in cream cheese then sift in powdered sugar and cocoa powder.
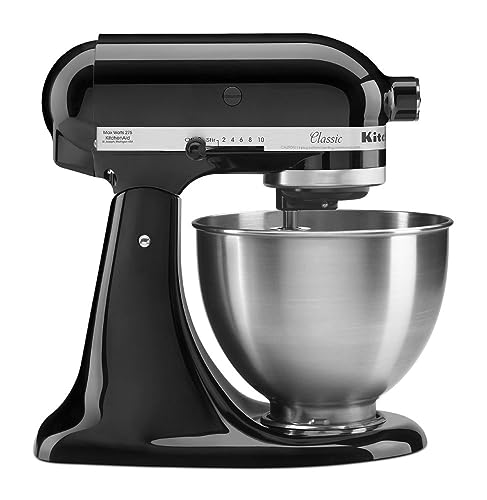
- Use an electric or stand mixer fitted with the paddle attachment and whip on low speed until smooth and combined.
- Add the sour cream, vanilla, and slightly cooled melted chocolate. Mix again on low speed to combine then scrape down the bottom and sides of the bowl.
- With the mixer running on low speed, very slowly drizzle the heavy cream in. Pause after every ¼ cup of heavy cream to allow the mixture to smoothen.
- Once all the heavy cream is added in, scrape down the bottom and sides of the bowl then whip on high speed for about 1-2 minutes or until the mixture reaches stiff peaks.
- Take the crust out of the fridge and pour the filling on top. Spread into an even layer.
- Cover and refrigerate the layered cheesecake for 4-6 hours or preferably overnight to allow the filling the set.
Make the ganache:
- Place chopped chocolate in a bowl or measuring cup. Set aside.
- In a small pot, heat heavy cream over medium heat until it starts steaming and the edges just barely start bubbling. Do not boil!
- Pour the hot cream over the chopped chocolate and let sit for 5 minutes. Whisk until the chocolate is melted and smooth.
- Set aside the ganache in the fridge for about 5-10 minutes or until no longer hot.
- Take the chilled cheesecake out of the fridge then unlatch and remove the sides of the springform pan. Place the cheesecake onto your serving plate then pour the ganache on top.
- Place the cheesecake back into the fridge for about 10-15 minutes to allow the ganache to set before slicing and serving!
Notes
* Use a good quality chocolate bar (not chocolate chips) for the best texture and flavor! Chocolate bars melt more smoothly and have a richer flavor while chocolate chips typically have a protective coating that inhibits melting and will lead to a grittier texture. After melting, cool the chocolate for about 5 to 10 minutes before adding it into the cheesecake batter. It's ok if it's a little warm but it shouldn't be hot. Also, don't let it cool too much or it will resolidify.
- Prep Time: 20 minutes
- Category: Cheesecakes
Enjoy!


Miran says
Macros? Calories?