
The ultimate bakery worthy Nutella donuts! These soft and fluffy donuts are made with an easy brioche style yeast dough that's fried to golden perfection. The donuts are then rolled in a cinnamon sugar coating and filled with gooey Nutella. They're the perfect treat to pair with a cup of coffee or tea, a great option for a sweet breakfast or brunch, or a just a little something to treat yourself! They can also be made ahead and stuffed with any other fillings you like!

bread flour vs all-purpose flour
Before we get into the details of this recipe, I wanted to take a minute to try to convince you to use bread flour for this recipe! Can these donut be made with all-purpose flour? Yes. Should they? I would say no!
Using bread flour in this donut recipe takes these donuts from standard to bakery level quality. Here are the key differences that make bread flour the better choice for these donuts:
- Protein - The most important difference! Bread flour has more protein than all-purpose (typically 1 or 2% higher on average but it can reach up to 5% more protein depending on which brand you're using as well as what country you're in). While 1% more protein doesn't seem like it would make much of a difference, it truly does! With more protein in bread flour, you can expect more gluten development...
- Gluten - If you've made a yeast dough before, you may have already heard that kneading the dough helps with "gluten development" - increased protein does the same, with less work! Gluten is a network of proteins and it's what gives bread its structure, helps it rise, and traps air bubbles within its web. So it's really a big deal in bread making!
- Liquid absorption - Lastly, bread flour absorbs more liquid than all-purpose flour. Since bread flour acts more like a sponge, you need to use less when compared to all-purpose flour. So if you do want to make the swap, it won't be an exact 1:1.
All in all: bread flour will produce a donut that's more fluffy, stretchy, airy, and chewy.

how to make Nutella donuts
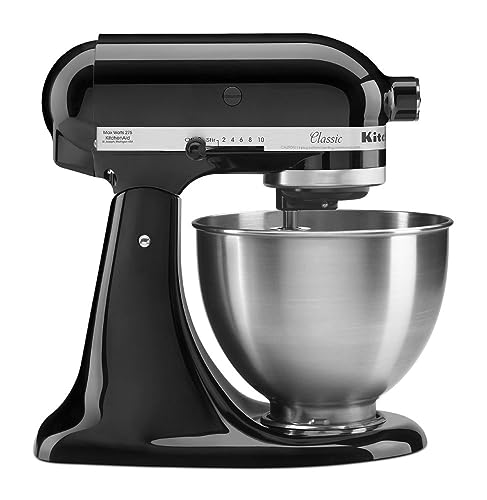
Making the dough for these donuts is super straightforward (and it's even easier if you're using a stand mixer - which I highly recommend and you'll see why in a second).
The dough starts by whisking together the dry ingredients. In a separate bowl, the milk and eggs are whisked together and then they're mixed into the flour mixture.
At this stage, the dough will be very sticky. The dough is then kneaded for about 8 minutes (if using a stand mixer) or until it's smooth and stretchy. This is the first part where a stand mixer is extra helpful, but you can technically do this by hand - it's just a REAL workout.
The key here is to add as little flour as possible to make the dough easy to handle and knead while still maintaining a soft, slightly tacky consistency.
The last step to making the dough is to slowly mix in the butter 1 tablespoon at a time. This is the other point where the mixer comes in handy. You need to be careful if you're kneading the dough by hand otherwise the warmth from your hands can melt the butter.
It's also important to go slow here and wait until the butter is fully mixed in before adding the next tablespoon. The butter will partially break the dough and it will look like it doesn't want to combine - just keep mixing until it does. If you try to add the butter all in at once, it won't emulsify properly and can split the dough.


how to tell when oil is ready to fry donuts
If you have a thermometer, use it to test the oil to see when it's reached around 350F to 375F. If you don't have a thermometer, you can use a piece of dough to test.
You should have a ball of wonky looking dough left over after you've rolled and cut all the donuts - this is perfect for testing the oil! Take a little piece from it and drop it in the oil. It should float to the top and should start bubbling around the edges immediately.
If the dough sinks to the bottom or it doesn't start bubbling and sizzling right away, the oil is too cold. If the dough browns immediately once it goes into the oil, it's too hot.
As you fry the donuts, you may need to adjust your heat every now and then to maintain even cooking. The donuts should cook within about 1-2 minutes on the first side and about 1 minute on the second side. If they're browning significantly faster or taking significantly longer, you'll know to adjust the heat.
how to transfer donuts to hot oil
The proofed donuts will be very delicate, so to make sure they keep their shape, the easiest way to transfer the risen donuts into the hot oil is to use the parchment paper. Cut squares of parchment paper around each donut like so:

Then grab 2 opposite corners of the parchment square, lift the donut up with the paper, and lower the donut and paper into the hot oil. Quickly (but carefully) use a pair of tongs to slide out the parchment paper and then fry the donuts until golden brown.
Make sure you don't overcrowd the pot! Not only will it be more difficult to maneuver the donuts but they will cool down the oil which can cause them to absorb more oil. You can usually fit around 2-3 donuts per batch but that depends on how wide your pot is.
how to fill donuts with Nutella
Before stuffing the donuts, roll them around in plain granulated sugar or cinnamon sugar to coat the outside. It's important to do this while they're still a little warm but not right when they get off the heat. If they're too hot, the sugar will melt. If they're too cold, the sugar won't stick! They're usually perfect after about 10 minutes of cooling.

Now for the final step: it's time to fill these bad boys!
If you have one of THESE Bismark piping tips, they're specially designed for filling donuts and they make the process a bit easier. A small plain tip can also do the trick. I personally make filed donuts once every blue moon, so I don't usually use any specialty tips and it works out fine for me!
Here's how to fill the donuts (it's the same process with or without a tip):
- Pierce a little hole in the donut. Use the tip of a sharp knife or wooden skewer to poke a small hole in the side of each donut. See below photo for visual.
- Fill a sturdy piping bag with Nutella. Try to use a bag that's made with slightly thicker material (I personally use THESE piping bags from Wilton). The Nutella is THICK so a sturdy bag will ensure you don't have to worry about it bursting. If you're not using a special piping tip, choosing a thicker piping bag also makes it easier to maneuver and control.
- Fill the donuts. Snip a little piece off the tip of your piping bag then insert the tip into that little hole you made in the donut earlier. Apply gentle pressure to the bag to push the Nutella into the donut - you should feel the donut start to get heavier and the tip should slowly push out as it gets really full.
* But be careful not to overfill the donuts! They can burst! Each donut can take about 1-2 tablespoons of filling - but slightly more or less is totally fine, so don't feel like you need to measure it.


make ahead / overnight instructions
You can prep this recipe the night before and then fry the next morning for fresh donuts for breakfast!
To make these donuts ahead, follow all the instructions up to and including step 13 (where you roll, cut, and arrange the donuts on a parchment lined tray). BEFORE you let them rest for 45 minutes to rise, cover them and pop them into the fridge right after they're cut out.
By placing the donuts in the fridge, you're slowing down the proofing process (which is the rest that allows the shaped dough to rise). You're basically extending the time you have in between cutting and frying.
Once they're in the fridge, you can wait up to 16 hours before frying them. When you're ready to fry, take the donuts out of the fridge and let them come up to room temperature before cooking. This will take around 1-2 hours depending on how warm your home is.
They may not puff up quite as much as they would if they were fresh, but that's OK. Fry normally once they've warmed up to room temperature.

FAQs
Can you use active dry yeast?
Yes! To use active dry, you need to dissolve it in liquid beforehand. Take the warm milk and mix the yeast into it along with about 1 tablespoon of the sugar. Set aside for 5-10 minutes or until the surface is foamy then whisk in the eggs and add this mixture into the dry ingredients. Active dry yeast takes longer to work, so it may take the dough an extra 10-20 minutes to rise.
Can you make these donuts dairy free?
Yes! You can use any dairy free milk you like and swap out the regular butter for DF / vegan.
Can you use other fillings?
Yes! You can fill these donuts with whatever donut filling you like. The donut dough isn't very sweet on its own, so try to pick a slightly richer / sweeter filling.
How do you store Nutella donuts?
Just like any yeast dough, these donuts are best served fresh. They will keep for up to 3 days tightly covered at room temperature - but the sugar coating will dissolve as they sit. The dough will also become less tender the longer they sit - so I would really try to serve them within 1-2 days.
check out these other recipes!
• Sour Cream Glazed Donuts
• Skillet Nutella Brownie
• Giant Nutella Stuffed Chocolate Chip Cookie
• Crème Brûlée Donuts
• Cinnamon Roll Donuts
• Nutella Chocolate Lava Cookies
Lastly, if you made this or any of my recipes, be sure to leave a comment and review below! I love hearing your thoughts! Also tag me on Instagram @eatsdelightfulblog so I can see what you're making.
Print
Nutella Donuts
- Total Time: 2 hours 45 minutes
- Yield: About 13 donuts (depending on the size)
Description
The ultimate bakery worthy Nutella donuts! These soft and fluffy donuts are made with an easy brioche style yeast dough that's fried to golden perfection. The donuts are then rolled in a cinnamon sugar coating and filled with gooey Nutella. They're the perfect treat to pair with a cup of coffee or tea, a great option for a sweet breakfast or brunch, or a just a little something to treat yourself! They can also be made ahead and stuffed with any other fillings you like!
Ingredients
For the dough:
- 3-4 cups (390g-520g) bread flour *SEE NOTES
- ¼ cup (50g) granulated sugar
- 2 ¼ teaspoons (1 packet) instant yeast **SEE NOTES for using active dry
- ½ teaspoon salt
- 1 cup (240g) milk
- 2 large eggs, room temperature
- 5 tablespoons unsalted butter, softened
- 1 teaspoon vegetable oil (or any neutral flavored oil) + more for frying
For rolling and filling:
- ½ cup (100g) granulated sugar
- ½ teaspoon ground cinnamon (optional)
- Nutella (a little over 1 cup)
Instructions
- In a large bowl of a stand mixer, whisk together 3 cups (390g) flour, granulated sugar, yeast, and salt to combine. Set aside.
- Pour milk into a microwave safe bowl. Heat in 10 second bursts in the microwave until the milk feels warm but not hot. You can also do this in a small pot on your stove top over low heat.
- Whisk the eggs into the warm milk to combine then pour this mixture into the large bowl with the flour.
- Use a spoon to roughly mix everything together until it starts balling up into a shaggy dough.
- Fit the stand mixer with the dough hook attachment. Knead the dough on low speed for about 8 minutes, adding flour as needed if the dough looks too sticky. You're looking for the dough to look smooth and stretchy. It should also pull away from the sides of the bowl but stick to the very bottom.
- Knead the butter into the dough 1 tablespoon at a time. Make sure the butter is fully worked in before you add the next tablespoon. It will look like it wants to separate at first but just keep mixing to incorporate the butter.
- Turn the dough onto a lightly floured work surface and shape it into a ball with your hands.
- Drop the ball of dough back into your large bowl (no need to wash it). Lightly brush the top of the dough with 1 teaspoon oil.
- Cover the dough with plastic wrap and set aside in a warm place to rise until doubled in size (about 1 hour).
- Cut out 13 (4-5 inch) parchment squares and arrange them on a large baking sheet or board. Set aside.
- Punch down the risen dough to deflate it and turn the dough onto a lightly floured work surface. Roll it out to roughly ½ inch thick.
- Use a 3" round cutter to cut out donuts. Gather, reroll, and cut any scrap pieces of dough. The dough will become stiffer the more you gather and reroll it - so if the dough starts shrinking in on itself, cover it and let it rest for 5-10 minutes to make it easier to work with.
- Arrange each donut cutout on your parchment squares, leaving about 2-3 inches of space between each one.
- Cover with plastic wrap and set aside for another 45 minutes or until they're slightly puffed. About 10 minutes before the 45 minutes are up, start prepping your station for frying.
- Place a large wire rack over a paper towel lined tray and set aside.
- Fill a large, high sided pot with about 3 inches of neutral flavored oil (like vegetable, canola, peanut, etc.). Place the pot over a stove burner set to medium heat. Preheat the oil to around 350-375°F.
- If you don't have a thermometer: To test if the oil is hot enough, drop a little piece of scrap dough into the pot. It should rise to the top and start bubbling around the edges right away. If it sinks or doesn't bubble around the edges, the oil is too cold. If it browns immediately, the oil is too hot. Adjust the heat accordingly.
- Lift the donut up using the parchment paper square and lower it into the oil. Use a pair of tongs to fish out the parchment paper. Fry 2-3 donuts at a time for about 1-2 minutes on each side or until golden brown. If they're browning too quickly or taking too long, adjust the heat accordingly.
- Use a spider strainer or slotted spoon to take the donuts out of the pan and place onto your wire rack to drain and cool. Continue frying the batches of donuts.
- In a wide bowl, whisk together granulated sugar and cinnamon. Drop one of the cooled donuts into the bowl and toss to coat with the sugar. Place back onto your wire rack and repeat with the remaining donuts.
- Use a pointy knife or a thick wooden dowel to poke a hole into the sides of each donut (see above post for visual).
- Fill a piping bag with Nutella and snip a small hole off the tip. Insert the tip into the hole in the side of the donut and pipe until the donut starts to feel heavier and the filling starts pushing back. Finally, dig in!

Notes
* Using bread flour makes for a more fluffy, stretchy, and chewy donut - so I highly recommend you use it! This recipe technically works with all-purpose, but it's less absorbent than bread flour - so you may find you end up needing more to achieve the right consistency.
** To use active dry yeast, you need to dissolve it in liquid before using. Whisk it into the warm milk along with 1 tablespoon of the sugar. Let sit for 5-10 minutes until foamy on top then whisk in the eggs and add this mixture to the dry ingredients.
Enjoy!


Add a Comment