
Made without cream cheese or sweetened condensed milk, these Oreo balls only need 4 household ingredients and a few minutes of work. They make the ultimate low effort but fancy no bake treat!
Who knew Oreos could looks THIS fancy??? These Oreo balls look like a complicated dessert, but you only need 4 ingredients, they're no bake AND are ready in no time! These also make an amazing year round treat: they're simple and refreshing enough to make in the summer while also decadent and extravagant enough to serve during Christmastime.

what are Oreo balls?
Oreo balls are basically just like a cookies and cream version of chocolate truffles! The texture of the center is like a dense, fudgy, and brownie-like cake pop with a nice crunchy snap from the chocolate coating on the outside. Oreo balls are most traditionally made using crushed Oreo cookies and cream cheese, but this is a simple cream cheese free version! This recipe is made by pulsing together Oreo cookie crumbs, melted butter, and milk to create the base mixture which is then rolled into balls and coated in chocolate.

how to make Oreo balls
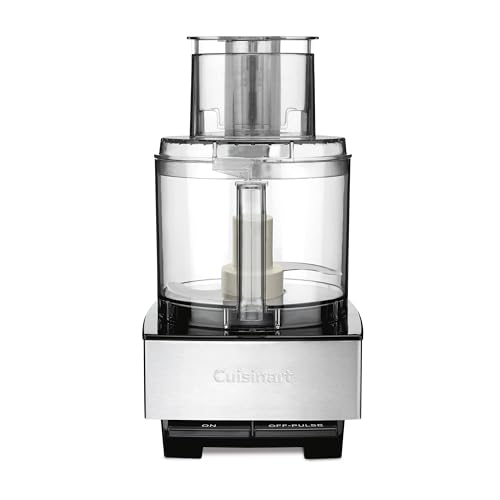
- Grind Oreo cookies into a fine crumb using a food processor.
- Pulse in the melted butter and milk. The mixture should be well moistened and easily stick together if you squeeze it with your fingers. If needed, gradually add in more milk until it reaches the right consistency.


- Scoop 1 tablespoon sized portions of the Oreo mixture and roll into balls. If you find you accidently added a bit too much milk and the mixture is too sticky to roll, you can simply scoop the portions onto a parchment lined baking sheet and freeze until firm enough to roll into smooth truffles.

- Chill the Oreo balls while you prep the chocolate. Make sure the Oreo truffles are frozen SOLID. It makes it so so SO much easier to coat them in chocolate.
- Melt chocolate & cool slightly before dipping the Oreo balls. Let the melted chocolate sit for a few minutes just so it's not piping hot before dipping the Oreo balls. Give each truffle a quick dunk and toss to coat in the chocolate then lift up the ball with a fork and gently shake off any excess chocolate.
- Allow the chocolate to set before enjoying! Lay the chocolate coated truffles back onto your parchment lined tray and set aside to allow the chocolate to set. It should quickly set up from the residual cold from the truffles, but you can also pop them into the fridge or freezer to speed it up. These truffles are best served cold.


working with the Oreo mixture
The truffle mixture is super easy to whip up and easy to work with, but here are a few potential scenarios you may deal with along the way and how to work through them:
- Oreo mixture crumbling between your fingers when you try to roll it? Blend more milk into the base mixture until it starts balling together.
- Oreo mixture too soft to roll into balls? Chill in the freezer for 5-10 minutes or in the fridge for 30-60 minutes or until firmed up enough to roll.
- Truffles getting too soft while you try to coat them in chocolate? The chocolate may be too hot and / or the truffles may not have firmed up enough in the freezer. Pop the truffles into the freezer if they're not frozen solid or try letting the chocolate sit for a few minutes to cool slightly.

FAQs
Can I make Oreo balls without a food processor?
You can, but it will require a bit more work! If you don't have access to a food processor, you could add the Oreo cookies into a large plastic bag, seal, then use a rolling pin to crush them into a fine crumbly mixture. Pour the cookie crumbs into a large bowl then mix in the melted butter and milk.
Can I make these gluten free?
Yes! Use an equal amount of gluten free Oreos instead of the regular cookies. Also make sure that the remaining ingredients are certified gluten free if you're on a strict diet. Some products may be manufactured in locations where gluten cross contamination is possible. Pure chocolate is naturally gluten free, but some brands DO use gluten products like barely / malt, so make sure to read the labels.
Can I make these dairy free / vegan?
Yes! All the ingredients can easily be swapped for dairy free / vegan alternatives. When it comes to the milk, you could use virtually any DF version you like, but I would try to pick one that has a mild flavor (or at least a flavor that you think pairs well with Oreos).
Can I substitute the butter?
You can, but it's important to choose a fat that can be melted down to a runny consistency and sets up firm like butter when it cools. Melted ghee or coconut oil make 2 great alternatives.
Can these be made using other types of cookies?
Yes! Basically any cookie with a similar texture to Oreos would work. When picking the cookies, if you use one without a filling, you will need to add more milk to the mixture to bring it all together. Some of my favorite alternatives to Oreos are graham crackers, Biscoff cookies, or Nilla wafers!
What can I top Oreo balls with?
You can serve these Oreo balls plain or decorate them with some extra toppings! Some of my favorites include a drizzle of white chocolate, sea salt flakes, or crushed Oreos!
How do I store Oreo truffles?
Keep these Oreo balls stored in a covered container and keep in the fridge. If you need to stack them in the container, place a piece of parchment paper between each layer to prevent sticking. These truffles soften if they sit at room temperature, so avoid taking them out of the fridge until right before you're ready to serve them! These will keep for up to 2 weeks.
Check out these other recipes!
• Giant Nutella Stuffed Chocolate Chip Cookie
• Oreo Cheesecake
• Chocolate Peanut Butter Fudge Bars
• Brownie Cupcakes
Lastly, if you made this or any of my recipes, be sure to leave a comment and review below! I love hearing your thoughts! Also tag me on Instagram @eatsdelightfulblog so I can see what you're making.

Oreo Balls Recipe
- Total Time: 30 minutes
- Yield: 16 truffles (approx.)
Description
Made without cream cheese or sweetened condensed milk, these Oreo balls only need 4 household ingredients and a few minutes of work. They make the ultimate low effort but fancy no bake treat!
Ingredients
- 30 (340g) regular Oreo cookies *SEE NOTES FOR GLUTEN FREE
- 3 tablespoons (45g) unsalted butter, melted and cooled
- 2-5 tablespoons whole milk
- 8 ounces (225g) dark, semi-sweet, or white chocolate, chopped **
- 1 teaspoon vegetable oil (optional) ***
Instructions
- Line a medium sized baking sheet or cutting board with parchment paper and set aside.
- In the bowl of a large food processor, add in Oreos (WITH the filling). Grind until the Oreos become very fine and crumbly.
- Add your melted butter and 2 tablespoons of milk to the Oreo crumbs. Pulse the mixture until it's well moistened and sticks together without crumbling. If needed, pulse in more milk, 1 tablespoon at a time, until the mixture comes together.
- Scoop out 1 tablespoon sized portions and roll between your hands into a smooth ball. Arrange on your parchment lined baking sheet.
- If you find the mixture is too crumbly to roll, blend in some more milk and try again. If you accidentally add too much milk and the mixture is too sticky to roll, scoop out the portions and drop them onto your baking sheet then chill in the freezer for 5-10 minutes or until firm enough to roll smoothly.
- Place the Oreo balls in the freezer to chill for at least 15 minutes or until solid before dipping in chocolate.
- Melt chocolate in your microwave or on the stove over a double boiler.
To melt in your microwave, place the chopped chocolate in a microwave safe bowl. Heat in your microwave in 10 second bursts, pausing after each one to stir, until melted and smooth.
To melt on your stovetop, place a pot filled with 1 inch of water over high heat until the water starts steaming but not boiling. Reduce heat to low to maintain a very light simmer. Place chocolate in a heat safe bowl that's large enough to fit into your pot without the bottom of the bowl touching the surface of the water. Warm the chocolate, stirring frequently, until melted. - If using, mix oil into the melted chocolate and set aside for 5 minutes to cool slightly. If the chocolate is too hot, it can melt the Oreo balls!
- Drop one Oreo ball into the melted chocolate and quickly toss to coat. Use a fork or chocolate dipping utensil to lift the ball up and gently shake over the bowl to allow the excess chocolate to drip off.
- Place the chocolate dipped Oreo ball back onto your parchment lined baking sheet. Leave the truffles plain or top with some flaky sea salt or crushed Oreo crumbs while the chocolate is still wet. You can also drizzle the tops with white chocolate after the coating has firmed up. Repeat with the remaining truffles.
- Chill the Oreo balls in the fridge or freezer until the outside chocolate layer is set. Keep stored in the fridge until ready to serve!

Notes
* You can swap regular Oreos with gluten free cookies - use an equal amount. Also make sure that the remaining ingredients are certified gluten free if you're on a strict diet. Some products may be manufactured in locations where gluten cross contamination is possible. Pure chocolate is naturally gluten free, but some brands DO use gluten products like barely / malt, so make sure to read the labels.
** Look for good quality chocolate that's made for melting. The best chocolate for melting is any chocolate labeled as "Baker's" or "couverture". Avoid using standard chocolate chips as they don't melt quite as well.
*** Adding oil to chocolate makes it easier to work with (it's more stable, less prone to seizing, and it loosens up the mixture slightly to make dipping easier). I recommend using it if you usually have trouble with working with melted chocolate!
- Prep Time: 20 minutes

Enjoy!



Add a Comment