
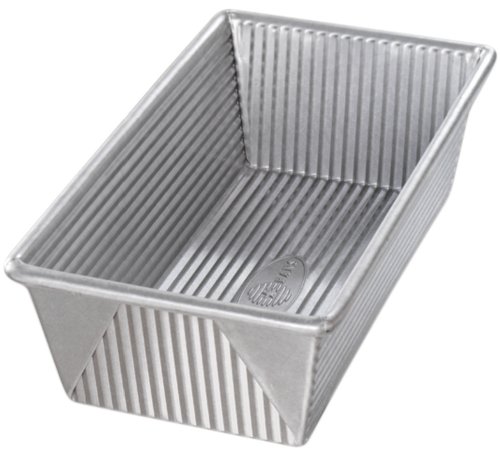
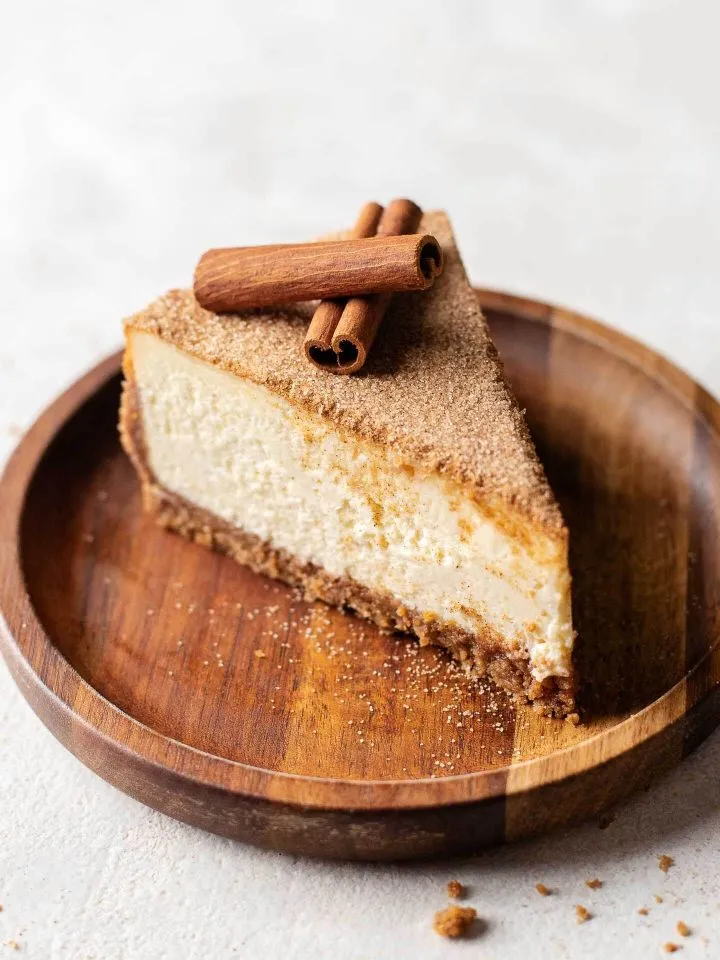
Made in a 9x5 inch loaf pan, this simple small batch cheesecake is the perfect serving size. Although it comes in a tiny package, this mini cheesecake still packs all the classic features of a New York style cheesecake: crispy cookie crust, rich and silky filling, and that perfect amount of tangy flavor!

what makes this small batch cheesecake so good?
- easy to whip up by hand
- more failproof than a full sized cheesecake recipe
- bakes and cools faster
- more manageable portions
- crispy graham cracker crust
- silky and creamy filling

how to make small batch cheesecake
1. Mix together graham cracker crust ingredients in a bowl.
2. Pack crust into baking pan, and bake. The crust won't look any different after baking, but this helps set the top of the crust so it doesn't absorb the filling! This make for a perfectly crisp and crunchy cookie layer.
3. Set aside the crust while you prep the filling.
4. Whisk together cream cheese and sugar until smooth.
5. Whisk in remaining filling ingredients (minus the eggs).


6. Whisk in the eggs, one at a time. Mix well before adding the next egg, but take care not to OVERmix! Over whisking at this stage can cause cracks in the cheesecake.

7. Pour the filling over the slightly cooled crust. It's ok if the crust is still warm!
8. Bake and cool!


how to bake cheesecake
Cheesecake is best baked in a steamy oven - this creates a smooth cheesecake top with a perfectly silky and creamy filling! A steamy oven is achieved by using a water bath, which can be done in 2 ways:
- traditional: Place your filled loaf pan into a larger roasting pan. A 9x13 inch cake pan works too - just make sure the sides are at least 2 inches tall! Move the 2 pans into the center rack of your preheated oven, then fill the larger pan with boiling water going about halfway up the loaf pan. * Note: it's easiest to fill the large pan with water after moving it into the center rack of your oven so you don't have to move it around afterwards.
- modern: Place a large pan with high sides on the bottom rack of your oven and fill with about 1 inch of boiling water. Place the cheesecake on the center rack directly above the water filled pan. This trick is especially helpful when making a full sized cheesecake because it can be QUITE difficult to find a roasting pan large enough to fit a 9 inch springform pan! I also prefer this method because it's easier to pull the cheesecake out of the oven.

how to tell when cheesecake is cooked through
Cheesecake has a few telltale signs to let you know it's ready to turn off the oven. The edges should be a light golden brown color and the top should be evenly puffed. If you jiggle the pan, the center should wiggle around but the edges should be firm.
how to cool cheesecake
Classic cheesecake has kind of a 3 step cooling process: first in the oven with the door slightly ajar, then on the counter until it reaches room temperature, then in the fridge until fully cooled. But since this cheesecake is so small, you can forgo the cooling in the oven and skip right to the counter!

how to serve cheesecake
You can serve cheesecake plain or topped off with whipped cream or frosting! My favorite frosting to pair with cheesecake is classic cream cheese frosting, but you could also use buttercream, ermine, or any other whipped toppings you like. Blueberry sauce or caramel sauce also make delicious options!
small batch cheesecake storage
Keep cheesecake covered and stored in the fridge until ready to serve. Cheesecake will keep for about 3 to 4 days in the fridge.

check out these other small batch recipes!
• Small Batch Brownies (without melted chocolate!)
• Small Batch Chocolate Chip Cookies
• Small Batch Brown Butter Chocolate Chip Muffins
• Small Batch Blueberry Crisp
Lastly, if you made this or any of my recipes, be sure to leave a comment and review below! I love hearing your thoughts! Also tag me on Instagram @eatsdelightfulblog so I can see what you're making.
Print
Small Batch Cheesecake Recipe
- Total Time: 6 hours
- Yield: 8 slices
Description
Made in a 9x5 inch loaf pan, this simple small batch cheesecake is the perfect serving size. Although it comes in a tiny package, this mini cheesecake still packs all the classic features of a New York style cheesecake: crispy cookie crust, rich and silky filling, and that perfect amount of tangy flavor!
Ingredients
For the graham cracker crust:
- 1 cup (105g) graham cracker crumbs
- 2 tablespoons granulated sugar
- ¼ cup (60g) unsalted butter, melted and cooled
For the cheesecake filling:
- 2 (8 ounce) bricks cream cheese (16 oz / 450g total), at room temperature *(see notes)
- ½ cup (100g) granulated sugar
- ¼ cup (60g) sour cream, at room temperature
- 2 tablespoons all-purpose flour
- ¼ teaspoon salt
- 1 teaspoon pure vanilla extract
- 2 large eggs, at room temperature
Instructions
- Position 2 oven racks on the bottom and center positions of your oven. Preheat your oven to 325°F. Line the bottom and sides of a 9x5 inch baking sheet with parchment paper, leaving a bit of parchment paper hanging over the edges to make it easier to pull the baked cheesecake out of the pan later.
- Make the graham cracker crust: In a medium bowl, mix together graham cracker crumbs, sugar, and melted butter until the crumbs are moistened.
- Pour the crumb mixture into your prepared baking pan. Use the bottom of a cup to firmly pack the mixture into the bottom of your pan.
- Bake the crust in the center of your preheated 325°F for 8 minutes. The crust won't change much in color - this just helps set the top so it stays crunchy after we add the filling!
- Set aside the crust to cool slightly while you prep the cheesecake filling.
- Make the cheesecake filling: In a large bowl, combine bricks of cream cheese and sugar. Using a wooden spoon or whisk, mix together until smooth and combined.
- Add sour cream, flour, salt, and vanilla to the cream cheese mixture. Whisk together to combine.
- Add the eggs in one at a time, whisking well between each addition. Take care not to overmix though! Just mix until the egg disappears into the batter.
- Pour the filling over your slightly cooled crust (it's totally fine if it's a little warm).
- Place a large baking pan with high sides on the bottom rack of your oven (I personally like to use a 9 inch cake pan with 2 inch high sides). Fill the pan with about 1 inch of boiling water. Place the cheesecake on the center rack directly above the water filled pan.
- Bake the cheesecake in the center of your preheated 325°F oven for 40 to 45 minutes, or until the edges are golden brown and the top is evenly puffed. If you gently shake the cheesecake pan, the center should also jiggle but the edges should be firm.
- Take the cheesecake out then cool completely to room temperature on your counter. Once cooled, cover and refrigerate for 4 to 6 hours or until firm and set.
- Use the parchment paper overhang to pull the cheesecake out of the pan. Slice and serve as is or paired with your favorite toppings!
Equipment
 Buy Now →
Notes
* Make sure to use the cream cheese that's sold as blocks / bricks, and avoid cream cheese spread!! Block cream cheese is firmer and better for baking. Cream cheese spread is softer and is really only good for, well, spreading!
- Prep Time: 20 minutes
- Bake Time: 48 minutes
- Category: Cheesecakes
Enjoy!


Add a Comment