
ABSOLUTE DECADENCE! Tiramisu brownies are a chocolate and coffee lover's dream come true! The bottom brownie layer is rich and SO fudgy and features a hint of espresso powder. It's topped with a layer of soft coffee soaked lady fingers and fluffy whipped mascarpone topping for that tiramisu look, taste, and feel!

what are tiramisu brownies?
Ever since I saw THIS viral tiramisu brownie video on Instagram, I've been SO EXCITED to try making my own because... I mean, tiramisu AND brownies!! Get out of town. It looked and sounded amazing, so I'm finally sharing my version of this deliciously perfect creation.
This tiramisu brownie recipe features 3 delicious layers to channel all the best flavors and textures that you'd find in brownies and tiramisu:
- Fudgy brownie bottom: This SUPER fudgy brownie bottom is based on my gooey brownie recipe (because why mess with perfection??) We're using a pretty traditional brownie batter but adding a little hint of espresso powder to give it another layer of coffee goodness. You don't taste a strong kick of coffee in the brownie layer because the rest of the flavors are so rich and strong, but it adds a subtle extra bit of flavor and it makes the brownie bottom taste EXTRA chocolatey.
- Coffee soaked lady fingers: It wouldn't be much of a tiramisu without lady fingers! So we're adding a little layer in between the brownie and mascarpone layers. The coffee also partially soaks into the top of the brownie to give it an even gooier and fudgier texture!
- Mascarpone cream topping: Simple and just 4 ingredients, this topping is light, airy and smooth. It holds sharp lines after cutting it but almost feels like a mousse! A nice dusting of cocoa powder on top helps complete the whole delicious package.

how to make the fudgy brownie bottom
This recipe starts with the brownie bottom. It's super easy to whip up and produces a SUPER fudgy, dense, and rich brownie! You can always find the full recipe details towards the bottom of the post, but here's a quick little breakdown of how to make the brownie layer:
- Melt butter then whisk in chocolate and coffee. Melt the butter in a pot until it just starts sizzling and then add in the chocolate and coffee. The residual heat should easily melt everything into a smooth mixture, but you can return the pot to low heat to help it along if there are any undissolved pieces of chocolate.
- While the butter mixture is still hot, pour it into a bowl with the sugar. By whisking the sugar into the HOT butter mix, it helps quickly cool down the butter and chocolate and also partially dissolves the sugar to help give the brownie its classic appearance and texture. The mixture will look grainy - that's normal!


- Whisk eggs in, one at a time. It's VERY important that the eggs are at room temperature for this step or the mixture may seize or solidify (or both!)
- Whisk in vanilla, oil, cocoa, and salt followed by flour. And the brownie batter is officially ready!
- Bake and cool. Ensure the brownies cool COMPLETELY to room temperature before you layer the tiramisu components on top (otherwise it can create a melty, goopy mess!)


making the tiramisu layers
The tiramisu portion of these brownies comes in the form of coffee soaked lady fingers and a creamy mascarpone topping layered over the cooled brownie base. To make the tiramisu layers:
- Start by making the coffee soak for the lady fingers. This just involves dissolving coffee and sugar in boiling water. Set it aside to cool completely to room temperature before using. *If it's hot, the lady fingers will oversoak and turn to mush.
- Very quickly dip lady fingers and arrange on top of the cooled brownie. The key here is to be QUICK. The lady fingers shouldn't be in the coffee for more than about 1 second or (again) they'll oversoak.
- To make the mascarpone topping, cream together cheese, powdered sugar, and vanilla. Mix until the mixture is combined and lump free.
- Mix in the heavy cream. Very slowly incorporate the heavy cream into the cheese mixture. If you try to go too quickly, the mixture may clump. After all the cream is added in, whip everything together until the mixture holds stiff peaks.
- Spread the mascarpone cream on top of the lady finger layer. Once it's all assembled, chill the layered brownie in the fridge for at least 1 hour before dusting with cocoa powder and slicing.


baking brownies
The best brownie in the world can easily go bad if it's under or over baked! To test for perfectly baked brownies, the top should no longer look wet and should have a slightly crackled top. If you insert a sewer into the center of the brownies, it should come out with a few fudgy, moist crumbs. If the skewer comes out with a smooth wet streak of batter, it needs more baking. If the skewer comes out clean, the brownie is overbaked!
how to slice tiramisu brownies
These brownies are actually super easy to slice with beautifully sharp lines! Before cutting, make sure the topping has thoroughly chilled and firmed up to ensure the cuts are clean. Once chilled, use a sharp, straightedged knife and cut straight down. Once the knife has cut through all the layers, carefully slide it out horizontally. Make sure to wipe the knife clean before making the next cut.
If you notice the brownie is sticking to the knife, run the blade under hot tap water, wipe dry, then try again - it should cut more smoothly then. If the brownie sat in the fridge for a long period of time and it's a bit too firm to easily cut through, you can also do the hot water trick or let it sit out at room temperature for about 5 to 10 minutes before cutting.


serving tiramisu brownies
Because of the cheese topping, these brownies should be kept in the fridge and served relatively cold. If you find the brownie has firmed up more than you like as it sits in the fridge, you can set it out at room temperature for about 15 to 20 minutes or until it's softened up slightly before serving. But I do recommend slicing the brownies while they're cold and then let them warm up to your liking - it's just much easier to get clean cuts when they're cold.
Just like with classic tiramisu, these brownies are best served within no more than 4 days. The lady fingers do continue to soften as they sit and they can get overly soft if left for longer than that.

FAQs
What's the best pan to bake brownies?
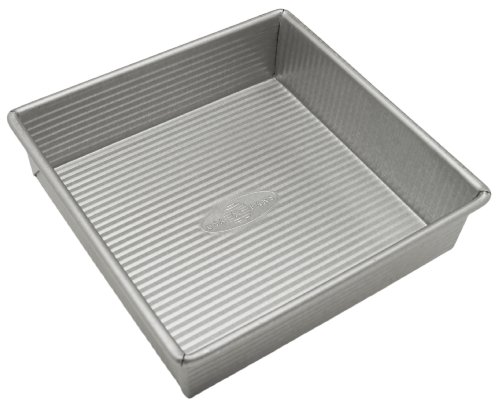
A heavy duty, light colored metal pan is the best for baking brownies because it heats evenly and at the perfect rate to yield moist and tender brownies. Avoid using glass or ceramic baking pans if you can - they take much longer to heat through and can cause the brownies to dry out. Also avoid thin / dark colored pans as these can burn the edges of the brownies before the center has a chance to cook through.
Can I add alcohol?
Yes! Feel free to add 1 to 2 tablespoons of your favorite coffee liqueur to the coffee soak for the lady fingers.
Are there any alternatives to mascarpone cheese?
Mascarpone cheese can be pricey and isn't really a household staple for a lot of people. So if you want an alternative, a block of cream cheese works perfectly in its place. Just make sure you're using the cream cheese that's sold in bricks / blocks and NOT the spread. Cream cheese spread is softer and will not firm up as nicely. Also keep in mind that cream cheese has a slightly stronger cheese flavor and more of a savory taste, so you may want to increase the amount of powdered sugar to account for the different flavor.
watch how to make tiramisu brownies
check out these other tiramisu recipes!
• Tiramisu Cupcakes
• Tiramisu Balls
• Tiramisu Cookies
• Classic Tiramisu
Lastly, if you made this or any of my recipes, be sure to leave a comment and review below! I love hearing your thoughts! Also tag me on Instagram @eatsdelightfulblog so I can see what you're making.
Print
Tiramisu Brownies
- Total Time: 2 hours 57 minutes
- Yield: 9 large brownie bars
Description
ABSOLUTE DECADENCE! Tiramisu brownies are a chocolate and coffee lover's dream come true! The bottom brownie layer is rich and SO fudgy and features a hint of espresso powder. It's topped with a layer of soft coffee soaked lady fingers and fluffy whipped mascarpone topping for that tiramisu look, taste, and feel!
Ingredients
For the espresso brownie bottom:
- ½ cup (115g) unsalted butter
- 6 oz (170g) semi-sweet chocolate, chopped
- 1 tablespoon espresso powder
- 1 ¼ cups (250g) granulated sugar
- 3 large eggs, at room temperature
- 1 teaspoon pure vanilla extract
- 3 tablespoons vegetable oil
- ½ cup (40g) unsweetened cocoa powder
- ¼ teaspoon salt
- ½ cup (65g) all-purpose flour, spooned and leveled
For the coffee soaked lady fingers:
- ⅔ cup (160mL) boiling water
- 1 tablespoon espresso powder
- 1 tablespoon granulated sugar
- 12 Savoiardi lady fingers
For the mascarpone cream topping:
- 8 oz (225g) cold mascarpone cheese*
- ⅓ cup (45g) powdered sugar
- 1 teaspoon pure vanilla extract
- 1 cup (240mL) cold heavy whipping cream
- cocoa powder (for dusting on top)
Instructions
Make the espresso brownie:
- Preheat your oven to 350F. Butter an 8x8 inch baking pan and line the bottom and sides with parchment paper. Leave a bit of extra parchment paper hanging over the sides of the pan to make it easier to pull the brownie out later.
- Add butter into a medium pot. Place over medium heat and cook until the butter melts and just starts to sizzle.
- ½ cup (115g) unsalted butter
- Take the butter off the heat and immediately whisk in the chocolate and espresso powder until melted and smooth.
- 6 oz (170g) semi-sweet chocolate, 1 tablespoon espresso powder
- In a large bowl, combine the hot butter / chocolate mixture and sugar. Whisk to combine. The mixture will be grainy - that's normal!
- 1 ¼ cups (250g) granulated sugar
- Whisk eggs in, one at a time, to combine. Once the eggs are all incorporated, mix in the vanilla, oil, cocoa powder, and salt to combine.
- 3 large eggs, 1 teaspoon pure vanilla extract, 3 tablespoons vegetable oil, ½ cup (40g) unsweetened cocoa powder, ¼ teaspoon salt
- Finally, add flour to the batter and mix until streak free. Take care not to over mix or the brownies will come out tough!
- ½ cup (65g) all-purpose flour
- Pour the brownie batter into your prepared baking pan and spread into a even layer.
- Bake the brownies in the center of your preheated oven for 27 to 32 minutes or until the surface no longer appears wet and a skewer inserted into the center comes out with fudgy/moist crumbs but no liquid batter.
- Set the brownies aside to cool completely to room temperature in the pan before layering the tiramisu components on top.
Make the lady finger layer:
- In a wide rimmed bowl, combine boiling water, espresso powder, and granulated sugar. Mix together until dissolved then set aside to cool completely to room temperature.
- ⅔ cup (160mL) boiling water, 1 tablespoon espresso powder, 1 tablespoon granulated sugar
- Once the coffee mixture has cooled, very quickly dunk the lady fingers into the coffee and arrange them on top of the cooled brownie. You may need to cut some of the lady fingers to fit. When dipping the lady fingers in the coffee, don't let them sit for more than about a second or they'll soak up too much coffee!
- 12 Savoiardi lady fingers
- Set aside to prep the cream topping.
Make the mascarpone cream topping:
- In a large bowl, combine the mascarpone, powdered sugar, and vanilla. Use an electric or stand mixer fitted with the paddle attachment to whip together until combined and smooth.
- 8 oz (225g) cold mascarpone cheese, ⅓ cup (45g) powdered sugar, 1 teaspoon pure vanilla extract
- With the mixer running on low, very slowly drizzle in the heavy cream while mixing. It's important to go very slowly or the mixture may clump up. Pause after each ¼ cup of cream is mixed in to scrape down the bottom and sides of the bowl. *If you find it difficult to drizzle the cream and mix at the same time, you can add about 1-2 tablespoons of cream at a time then mix on low to combine and continue gradually adding in the cream like this.
- 1 cup (240mL) cold heavy whipping cream
- Once all the heavy cream is mixed in, bump the mixer speed up to high and whip for about 1 to 2 minutes or until the mixture thickens and holds stiff peaks.
- Drop the whipped mascarpone cream on top of the brownie / lady fingers and spread into an even layer.
- Chill the layered brownie in the fridge for at least 1 hour or until the topping has firmed up.
- Use the parchment paper overhang to pull the brownie out of the pan and onto a cutting board. Dust the top with cocoa powder then slice and serve.


Notes
* If you can't get your hands on mascarpone cheese (or are looking for a budget friendly alternative) an 8oz block of full fat cream cheese works in its place! Make sure to use the cream cheese that's sold in bricks / blocks and NOT cream cheese spread (which is softer and won't set up as firmly). Also note that mascarpone has a milder, less cheesy flavor and has more of a sweet flavor profile while cream cheese will have a stronger taste and more of a savory flavor. You may want to bump the powdered sugar in the topping up to ½ cup (65g) depending on your taste.
- Prep Time: 30 minutes
- Bake Time: 27 minutes
- Category: Brownies

Enjoy!


Rachel says
Wondering how far in advance I could make this - would it save in the fridge for a couple of days before serving?
Mimi says
Hey Rachel! The brownie portion can keep for 1-2 weeks in an airtight container in the fridge - the less air it's exposed to, the longer it'll last! After topping with the lady fingers and mascarpone cream, it's best served within 2 days (4 days max) because the lady fingers will oversoak the longer they sit. I hope that helps! ❤️
Tiramisu lover says
Can I freeze this?
Mimi says
You could try freezing the brownies (without the lady fingers and mascarpone topping)! I just don't think the toppings would thaw very well ❤️
Robot Coffee says
I just recently made these and they were amazing. Everyone who tried them loved it! I didn't use espresso powder, rather ground some of my good beans and made some coffee, it all turned out amazing!
Aruna Abraham says
Made this a few days ago to celebrate my husband's birthday. The taste was superb! I did tweak the amounts of sugar used for the brownie, but other than that, I pretty much followed the recipe given.
I did have an issue with the lady finger layer being separate from the brownie layer. Pro tip: it helps to poke holes into the brownie and pour the coffee mixture over the brownie and then layer the ladyfingers.
Felicia says
This recipe is so delicious. I did bump up the amount of espresso in the brownie base to 2T. And wow, so good!
My only suggestion is that the ladyfingers and marscapone top tend to separate from the brownie base. Do you have any suggestions? The only thing I can think of is to spread a very thin layer of the marscapone on top of the brownie before layering on the ladyfingers.
Otherwise all good! Thank you so much for sharing this! I love it more than the traditional tiramisu. 😊
Colleen says
I made this recipe with some homemade ladyfingers and it was a hit with all of my friends. Great recipe- thank you 🙂
Rachel says
I saw this on IG a few weeks ago and have been dying to try it. I made it for our Valentine’s Day dessert tomorrow but had to try a bite tonight and it was delicious. I love that all the ingredients are shared within the steps, so I don’t have to go back and forth as I bake. Definitely look forward to trying more recipes from this blog!
Cass says
I just came across your recipe today and can't wait to make it. I just wanted to say that I love how you also list the ingredients with the relevant step. Saves scrolling back up to see quantity and back down to find your place.
Rachel says
I’ve been salivating over this recipe for two weeks, after seeing it on Instagram, and made it for Valentine’s Day tomorrow … but I snuck a bite tonight. It is so good! Thank you for posting the ingredients with each step. That helps so much. Can’t wait to bake more from your blog!
Bella says
This recipe is a must-try! I really appreciated all the little tips and pictures along the way as they helped to perfect each layer. I highly recommend letting it set in the fridge overnight if you have the time, it firms up perfectly!