
Taking classic brownies to the NEXT LEVEL. These turtles brownies feature a fudgy pecan brownie bottom, topped with homemade soft caramel (made without a candy thermometer!) and finished with a shiny milk chocolate ganache. They're rich, chocolaty and so very decadent. This post is also packed with detailed instructions, step by step photos, and a video!

what makes these turtles brownies so good?
This recipe took SO many tries to get right. I lost count of how many batches I made and I think I'll be finding pecan bits on my floor for the next 5 years. Three of the attempts ran until 2 am only to end up fails - doing dishes at 2 am also isn't much fun just FYI. So trust me when I say: this recipe is the one.
These brownies are truly out of this world. They were inspired by one of my favorite candies: turtles chocolates. If you're unfamiliar with the candy, it's essentially a caramel pecan cluster that's covered in milk chocolate. I wanted to channel all that flavor and gooey caramel goodness in these brownies, so we have 3 main parts going on in this recipe:
- Pecan brownies - We're starting with a brownie batter that's similar to the one I use in my tiramisu brownies recipe (because it's super easy to make but still comes out deliciously fudgy). Chopped pecans and chocolate chips are folded in to add some of that classic turtles flavor and texture. It bakes up into dense, moist, and fudgy perfection!
- Caramel layer - This was the part that really gave me a lot of trouble. The caramel would either end up too soft or too hard. So I can't tell you how immensely happy I was to get this reel on my Instagram feed that basically solved all of my problems. I wanted the caramel layer to set up to a soft and chewy candy consistency without the need for a thermometer. That reel gave me the most simple and genius way to do it: marshmallows! The gelatin in the marshmallows coupled with the butter in the caramel sauce will allow this layer to set to the perfect soft, gooey, and chewy consistency.
- Milk chocolate ganache - The final layer to complete the turtles candy experience: a simple, silky milk chocolate ganache to go on top. If you prefer a firmer chocolate layer, you could skip the heavy cream and just melt 6 oz of milk chocolate for a crisp and snappy top.

pecan brownies
These brownies have 3 different components going on, so I wanted to go for an easy to make brownie bottom in order to simplify as much of the process as possible. This is one of my favorite ways to make brownies and doesn't involve beating eggs and sugar together, so it saves a lot of time. It's the same technique I use for my tiramisu brownies!
Making the brownies starts with melting the butter and chocolate until smooth. The butter mixture is then poured over the sugars while it's still hot. It will partially melt the sugars (which is what helps give the brownies their dense and fudgy texture) and the sugars will help cool down the butter mixture faster.
After that's done, the eggs are whisked in followed by the vanilla, oil, cocoa, and salt. The oil really helps make for an extra moist and gooey brownie. And since this brownie needs to be stored in the fridge to ensure the other layers don't melt, the oil helps keep it from drying out.


The final step for making the brownie batter is to fold in the remaining ingredients and then it's ready to bake!
When baking brownies, you'll know it's time to pull them out of the oven when a skewer inserted into the center comes out with moist, fudgy crumbs. The skewer shouldn't have any smooth batter on the tip - that means the brownies need to bake a bit longer. The skewer also shouldn't come out fully clean, otherwise it means the brownies are overbaked.


caramel layer
The next layer in this brownie is the caramel. Making homemade caramel can sound a bit intimidating, but there are just a few things to keep in mind to ensure you're caramel comes out perfect:
- Get ready - Homemade caramel comes together quickly and can potentially burn if left unattended. So measure out all of your ingredients and get all of your tools and utensils ready BEFORE starting so you don't need to run around your kitchen!
- Use a tall pot and long handled utensils - The caramel will bubble up and splatter at certain points in the recipe. So choose a pot with high sides and utensils with long handles to prevent spills and keep your hands away from the splattering.
- Don't mix... at first - When you first start the caramel and you just have sugar and water in your pot, don't stir the mixture or the sugar may crystalize and cause the syrup to solidify and clump. Instead, swirl your pan gently if needed to help everything melt and brown evenly. After adding in your next ingredient (which is the butter) you can then start to stir the mixture.
- Stay by its side - There are certain points where it won't really look like much is happening, but the sugar will brown suddenly. So keep a close eye on it to ensure it doesn't burn.
- Be careful - Hot sugar is... well, HOT. So be careful when working with it and be especially careful when you add ingredients in because it will splatter once you introduce new liquids.


milk chocolate ganache
The final layer for these decadent brownies is a creamy milk chocolate ganache. This simply involves pouring warm cream over milk chocolate to melt and then pouring that over the brownie. The brownie then needs to sit in the fridge for a few minutes to allow all the layers to set until firm enough to slice.
how to slice turtles brownies
These brownies have a lot of beautiful layers going on. So to showcase them, here's how you can get the cleanest brownie slices:
- Keep cool: These brownies are easiest to slice when they're cool, so make sure you give them enough time in the fridge for all the layers to set. If you notice the brownies start to get soft while you're slicing them, pause and pop them back into the fridge or freezer to allow everything to set before continuing.
- Oil your knife: What a difference this makes! We have a lot of gooey, chewy, and sticky layers in these brownies. So oiling your knife will help it glide through the brownie more smoothly.
- Cut straight down: When it comes time to actually slice the brownies, don't saw the knife back and forth or it'll create jagged edges. Instead, cut straight down in one motion and then carefully drag the knife out of the brownie horizontally.
- Clean the knife between slices: You'll notice the brownie will still stick to the knife even when it's oiled. So wipe off any residue after every slice and oil the knife again before moving on to the next cut.


FAQs
Can you use granulated sugar instead of brown?
You can use all granulated sugar in the brownies if you prefer. I just personally find the brown sugar adds a nice flavor and moist texture to the brownies that pairs perfectly with the other components.
Can you skip the oil in the brownies?
I wouldn't recommend it because it helps keep the brownies soft and moist - especially considering the fact that they'll be stored in the fridge. Using all butter will cause the brownies to harden and dry out.
Can you use other types of cocoa powder?
Yes! Dutch processed or black cocoa powder would also work. Black cocoa will slightly alter the flavor and appearance of the brownies giving them a darker chocolate taste and black color.
Do I have to use marshmallows in the caramel?
They're necessary if you want consistent results without a thermometer. The marshmallows are the main ingredient that allows the caramel to actually set to a sliceable texture. If you prefer to leave them out, I would just serve the caramel on the side to drizzle over each individual slice.
How do you store turtles brownies?
Keep these brownies covered and stored in the fridge to ensure the caramel and ganache remain nice and firm. They'll keep for up to 1 week.
How do you serve turtles brownies?
These brownies are best served cool (again, to ensure the other layers don't soften). If you find the brownie has firmed up a bit too much for your liking, simply let it sit out at room temperature for about 5-10 minutes to soften slightly before serving.

watch how to make turtles brownies
check out these other chocolate recipes!
• Brownie Cupcakes
• BEST Gooey Brownies
• Chocolate Mousse Cake
• Chocolate Espresso Cake
• Nutella Chocolate Lava Cookies
• Chocolate Chip Cookie Brownies
Lastly, if you made this or any of my recipes, be sure to leave a comment and review below! I love hearing your thoughts! Also tag me on Instagram @eatsdelightfulblog so I can see what you're making.
Print
Turtles Brownies
- Total Time: 1 hour 20 minutes + 3 hours chill time
- Yield: 16 brownies
Description
Taking classic brownies to the NEXT LEVEL. These turtles brownies feature a fudgy pecan brownie bottom, topped with homemade soft caramel (made without a candy thermometer!) and finished with a shiny milk chocolate ganache. They're rich, chocolaty and so very decadent. This post is also packed with detailed instructions, step by step photos, and a video!
Ingredients
Pecan Brownies:
- ¾ cup (150g) granulated sugar
- ½ cup (100g) dark brown sugar, packed
- ½ cup (115g) unsalted butter, sliced
- 6 oz (170g) good quality semi-sweet chocolate, chopped
- 3 large eggs, room temperature
- 1 tsp pure vanilla extract
- 3 tbsp vegetable oil
- ½ cup (45g) unsweetened cocoa powder
- ½ tsp salt
- ½ cup (65g) all-purpose flour, spooned and leveled
- 1 cup finely chopped pecans
- ¾ cup mini semi-sweet chocolate chips
Caramel Layer:
- ¼ cup water
- 1 ¼ cups (250g) granulated sugar
- 6 tbsp unsalted butter, sliced
- ½ cup heavy whipping cream
- ¾ cup (40g) mini marshmallows, packed
- ½ tsp salt
- 2 tsp pure vanilla extract
Milk Chocolate Ganache:
- 4 oz milk chocolate, chopped
- ¼ cup heavy whipping cream
Instructions
Pecan Brownies:
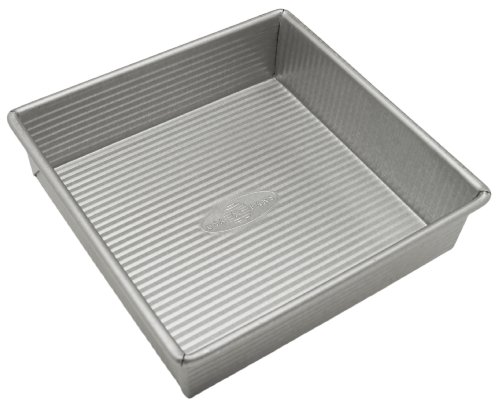
- Preheat your oven to 350F. Grease an 8x8" baking pan and line the bottom and sides with parchment paper. Leave a bit of extra parchment paper hanging over the sides to use later as a handle to pull the brownies out of the pan.
- In a large bowl, combine granulated and brown sugar and set aside.
- Add butter into a small pot and place over medium heat. Heat until melted and sizzling. Take it off the heat and whisk in the chocolate until melted and smooth.
- Immediately pour the hot chocolate / butter mixture over the sugars and whisk to combine. It should partially melt the sugars but the mixture will still look gritty.
- Whisk in the eggs followed by the vanilla, oil, cocoa powder, and salt.
- Add the flour, pecans, and chocolate chips and fold together until combined. Be careful not to overmix.
- Pour the brownie batter into your prepared baking pan and spread into an even layer. Bake the brownies in the center of your preheated oven for 30-35 minutes or until a skewer inserted into the center comes out with moist, fudgy crumbs.
- Cool the brownie in the pan for about 1 hour or until no longer hot before making the caramel.
Caramel Layer:
- Before you start: Measure out all of the ingredients for the caramel and set them close by. The caramel will come together very quickly so you won't have much time between steps to measure anything. Pick out a medium saucepot with high sides and ready a whisk or wooden spoon with a long handle. The caramel will bubble up and triple in volume at certain points, so a tall pot and long handled utensils will help you keep away from any splatters!
- In your saucepot, combine water and sugar.
- Place onto a stove burner set to medium heat. Cook (without stirring) until it melts, bubbles, and eventually turns a rich amber color. If needed, gently swirl the pan to help it brown evenly, but don't stir it with a utensil at this stage or the sugar may crystalize.
- As soon as the sugar browns, quickly (but carefully) add in the butter and whisk until melted and smooth. It will almost triple in volume but will settle down once the butter has melted.
- After the butter is melted, immediately whisk in the heavy cream. Again, it will increase in volume and may appear to seize up at first. Just keep mixing and cooking the mixture until it all melts back into a smooth sauce.
- Reduce the heat to low to maintain a gentle simmer. Boil the caramel for about 2 minutes while mixing regularly.
- Now add in the marshmallows and cook, while stirring, until the marshmallows are fully melted.
- Turn off the heat and move the pot off to the side. Whisk in the salt and vanilla.
- Let the caramel sauce cool for about 5 minutes then pour it over the brownie in the pan. Tilt the pan from side to side to level the caramel into an even layer.
- Place the brownies in the fridge for about 30 minutes or until the surface of the caramel feels set. If you gently poke it with your finger, you shouldn't get any residue on your hand.
Milk Chocolate Ganache:
- Place the chopped milk chocolate into a bowl and set aside.
- Pour the heavy cream into a small pot. Warm over medium heat until the edges just start to bubble - but do not boil.
- Pour the warm cream over the chocolate. Let sit for about 1 minute then mix until melted and smooth. It will look quite loose.
- Pour the ganache over the caramel layer and tilt the pan to even out the ganache.
- Chill the brownie in the fridge for about 1 hour or until the ganache looks set.
- Use the parchment paper to pull the brownie out and onto a cutting board. Slice the brownies with an oiled knife and wipe clean between cuts. If the layers start to soften while you're slicing, pause and place the brownies back in the fridge or freezer to firm up before continuing.
- Top with more chopped pecans if desired then enjoy!

- Prep Time: 40 minutes
- Cook Time: 10 minutes
- Category: Brownies

Enjoy!


Cheryl J. says
Followed the recipe exactly. Brownies were very fudgy. Caramel was perfect. I felt a little intimidated to try, but was pleasantly surprised at the outcome. Absolutely delicious!